The checkout link feature in Google Shopping offers a streamlined purchasing option by enabling a “Buy Now” button that adds products directly to the shopping cart and takes the customer to the checkout page. This function is beneficial for straightforward products that require no customization. However, retailers should use caution: it may lead to increased cart abandonment as shoppers often prefer to review product details, images, and videos on the product page before committing to a purchase. It’s advisable to run tests to see whether a direct checkout link affects conversion rates positively or negatively.
Be extra careful if you have a lot of upsell and cross-sales. Enabling the checkout link will create a negative effect.
Google Merchant Center Next
Enable in Google Merchant Center Next UI
To enable this feature go to Google Merchant Center
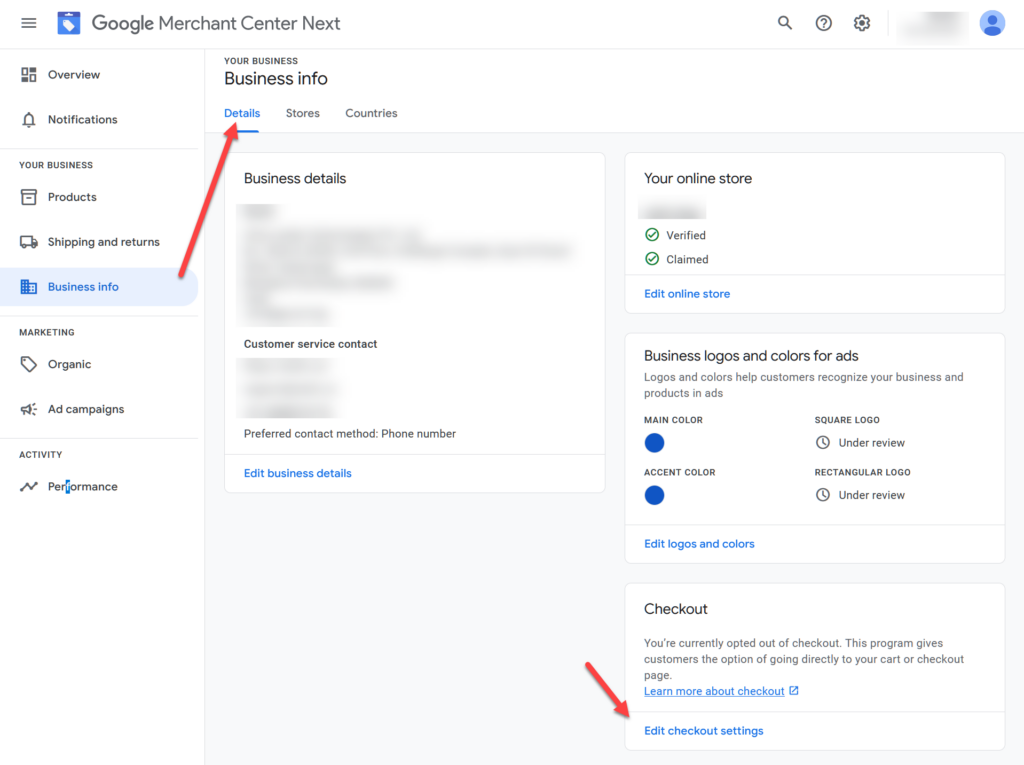
- Click on Business Information
- In the details tab click on Edit checkout settings
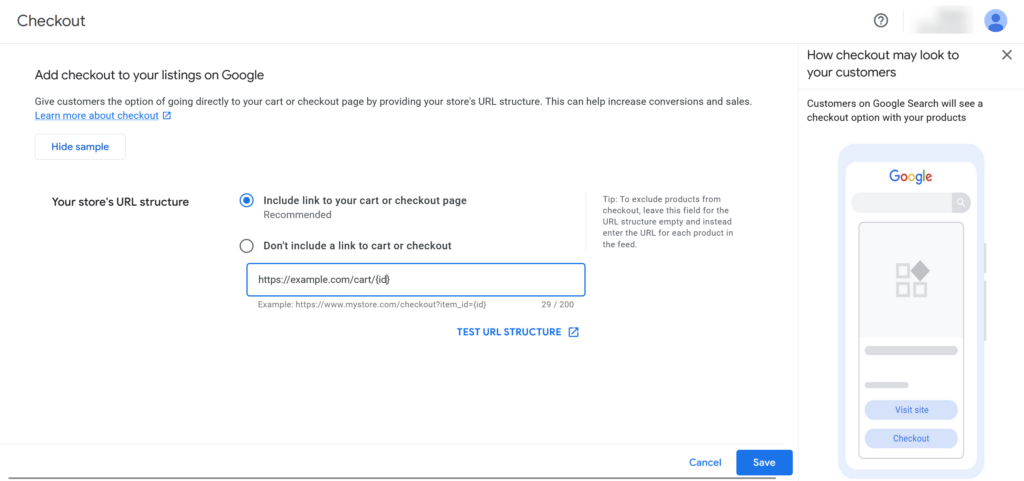
- Choose the Include link to your cart or checkout page option
- Enter the URL pattern: https://yourdomain.com/cart/{id}:1—make sure to replace “yourdomain.com” with your actual domain.
- Ensure your product IDs match the default format used by your shop, such as “shopify_US_123456789_123456789” for Shopify.
- After setting up, test the link to confirm it’s working correctly by clicking on the test button.


Google Merchant Center Classic
Enable in Google Merchant Center UI
To enable this feature in Google Merchant Center:
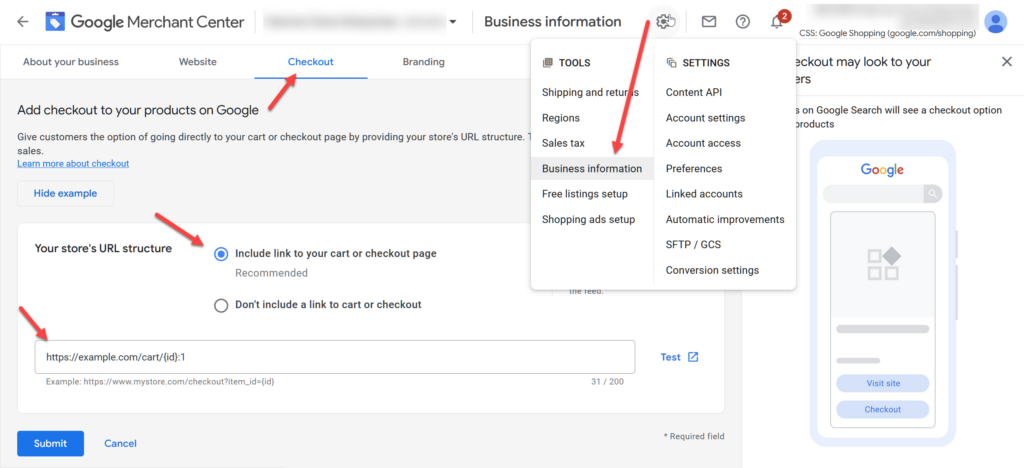
- Click on the gear icon in the top right corner.
- Go to “Business Information”.
- Navigate to the “Checkout” tab.
- Choose the “Include link to your cart or checkout page” option for your store’s URL structure.
- Enter the URL pattern: https://yourdomain.com/cart/{id}:1—make sure to replace “yourdomain.com” with your actual domain.
- Ensure your product IDs match the default format used by your shop, such as “shopify_US_123456789_123456789” for Shopify.
After setting up, test the link to confirm it’s working correctly by clicking on the test button.

Enable in the data feed
You can also enable the checkout link by adding the checkout_link attribute in your data feed at the source. Check your Shopify documentation on how to add the checkout_link attribute. When you can add the attribute, you will do the same when you add https://yourdomain.com/cart/123456789:1
Replace yourdomain.com with your actual domain URL and instead of adding {id} after cart, you add the variant ID value.

