

When it comes to advertising, we have two types of conversions. Macro and Micro conversions. Macro conversions are the website’s primary conversions, such as completing an order or submitting a lead form. Micro conversions are smaller actions such as add to cart, view cart, add a delivery address, etc.
This article will explain how to track micro conversions in Shopify for your Google Ads account.
Requirements
You need access to the following accounts.
- Google Analytics
- Google Tag Manager
- Google Ads
- Shopify
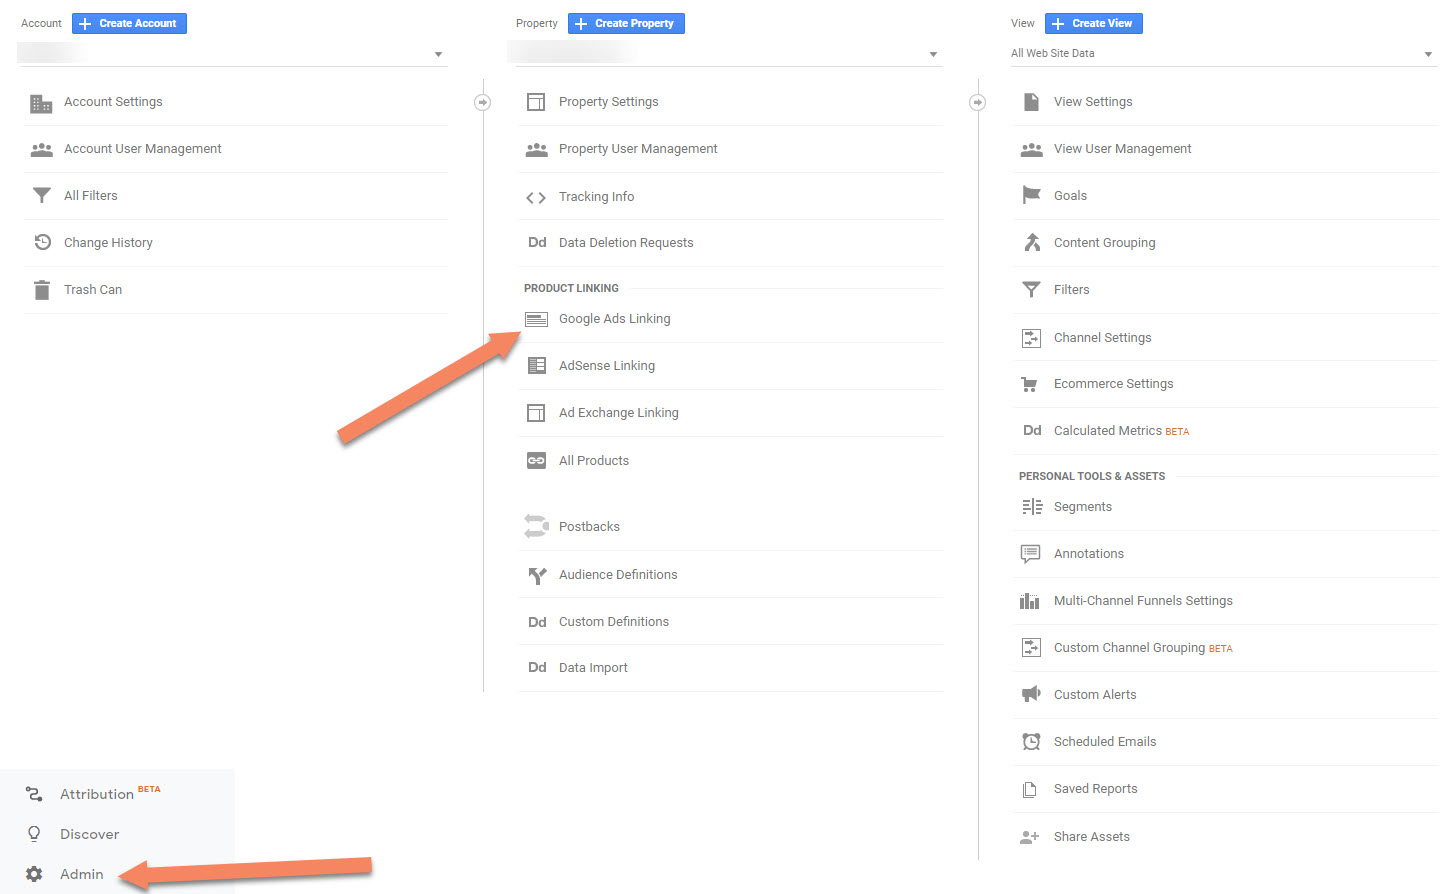
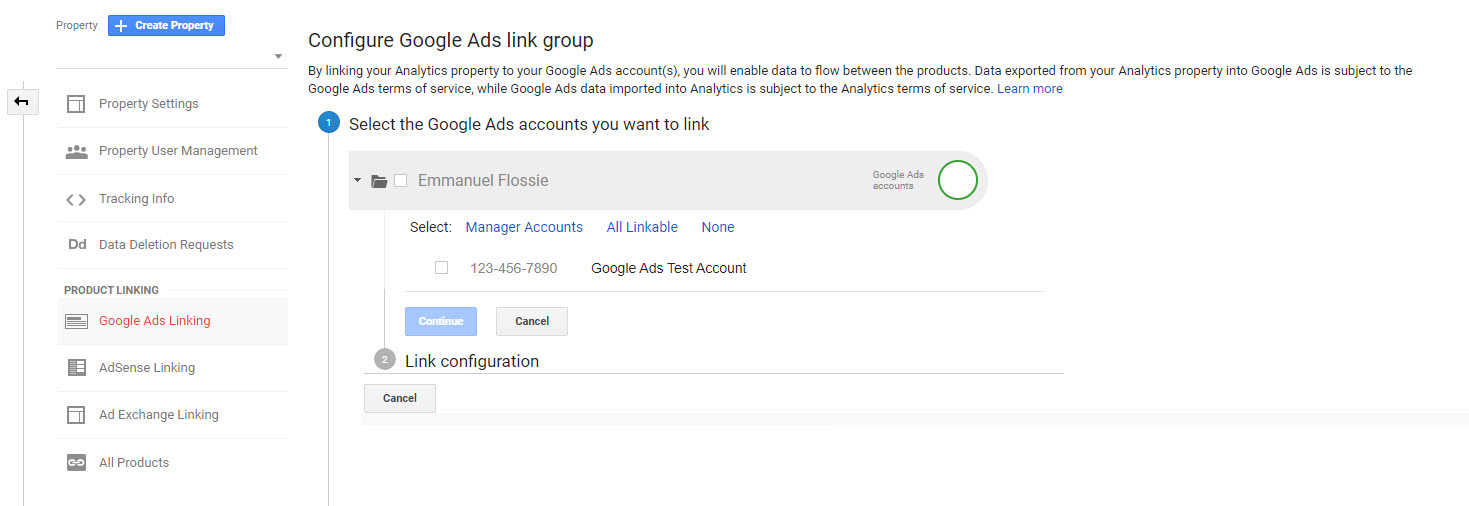
Link Google Analytics to Google Ads
Go to Google Analytic’s Admin panel and choose under Product Linking > Google Ads Linking. Next, select your account and click continue.
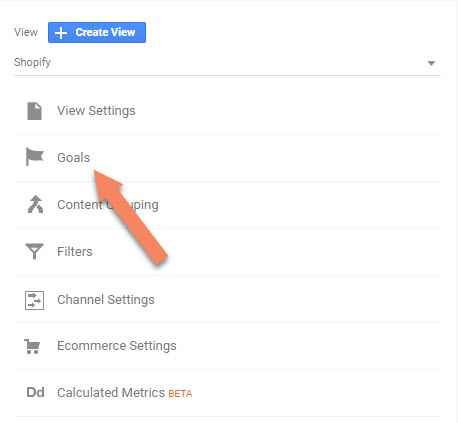
Create Your Goals In Google Analytics
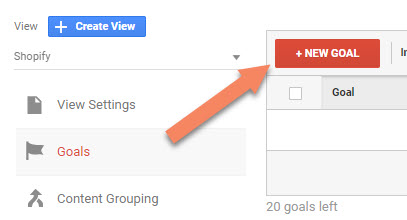
Again go to the admin panel of Google Analytics and under the view section (far right), click on Goals.
Now click on New Goal
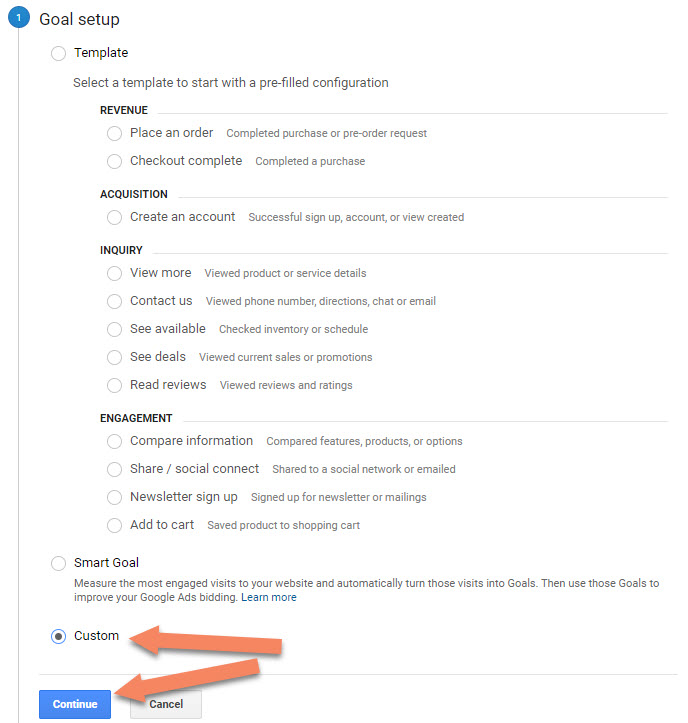
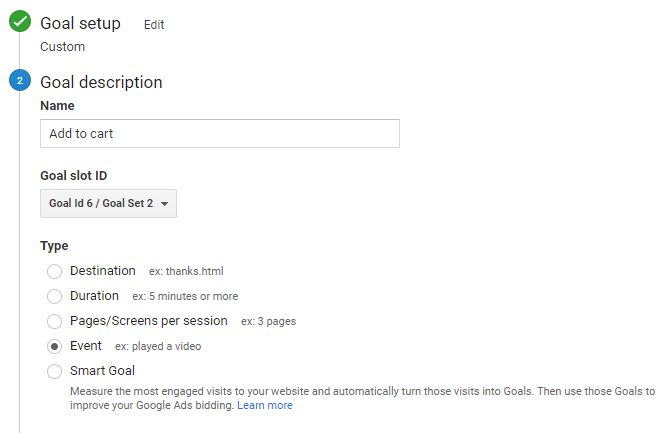
Now from the Goal Setup, choose custom and continue.
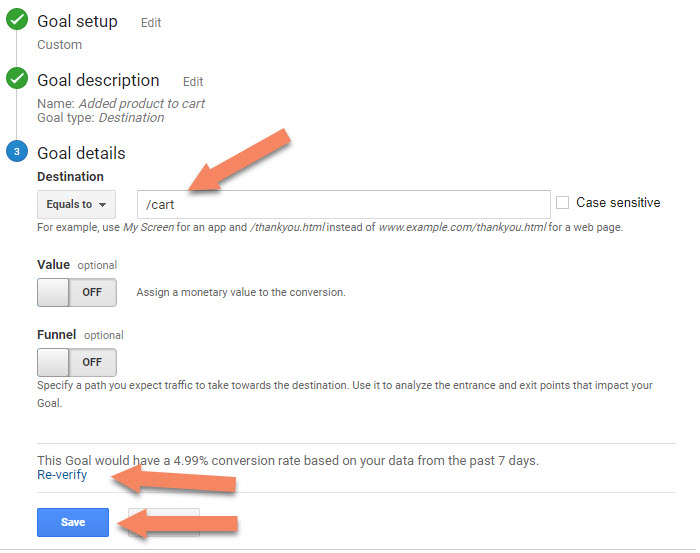
Now enter a name. I have chosen the name View cart. You can choose any name you like.
And choose Destination as your type. Leave Goal slot ID as default. Now continue.

For the destination, we want to set equals to and the value /cart
You can click on verify to see if you have already received clicks to this destination. Now click on Save.
Linking Goals To Google Ads
Go to Google Ads and navigate to Tools & Settings > Conversions

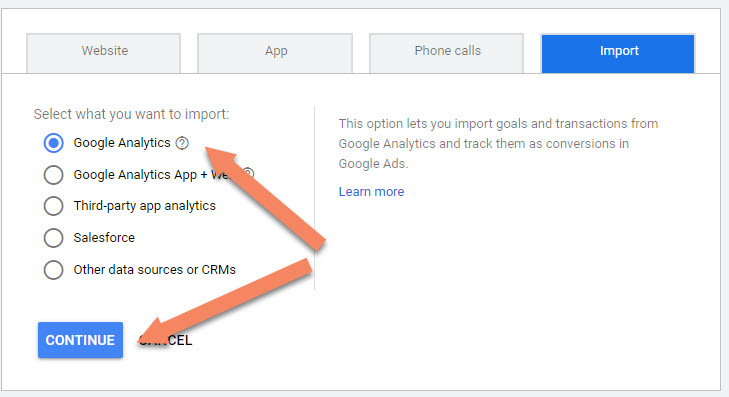
Now click on the blue plus sign and choose import.
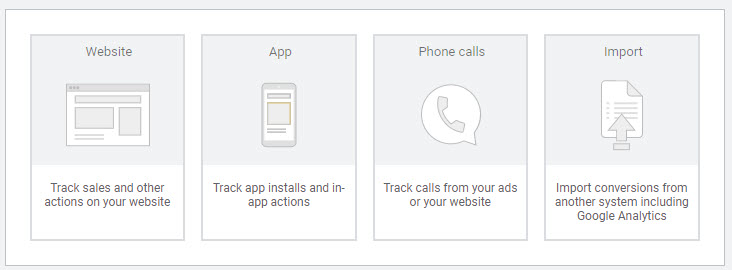
Choose Google Analytics from the import options and continue.
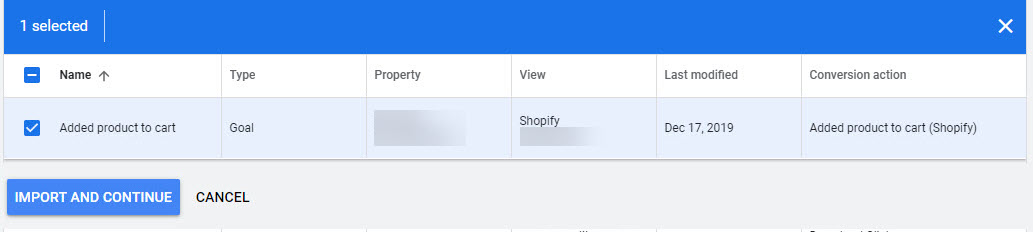
Choose your goal and click on import and continue, then click on done.
Google Ads Conversion Settings
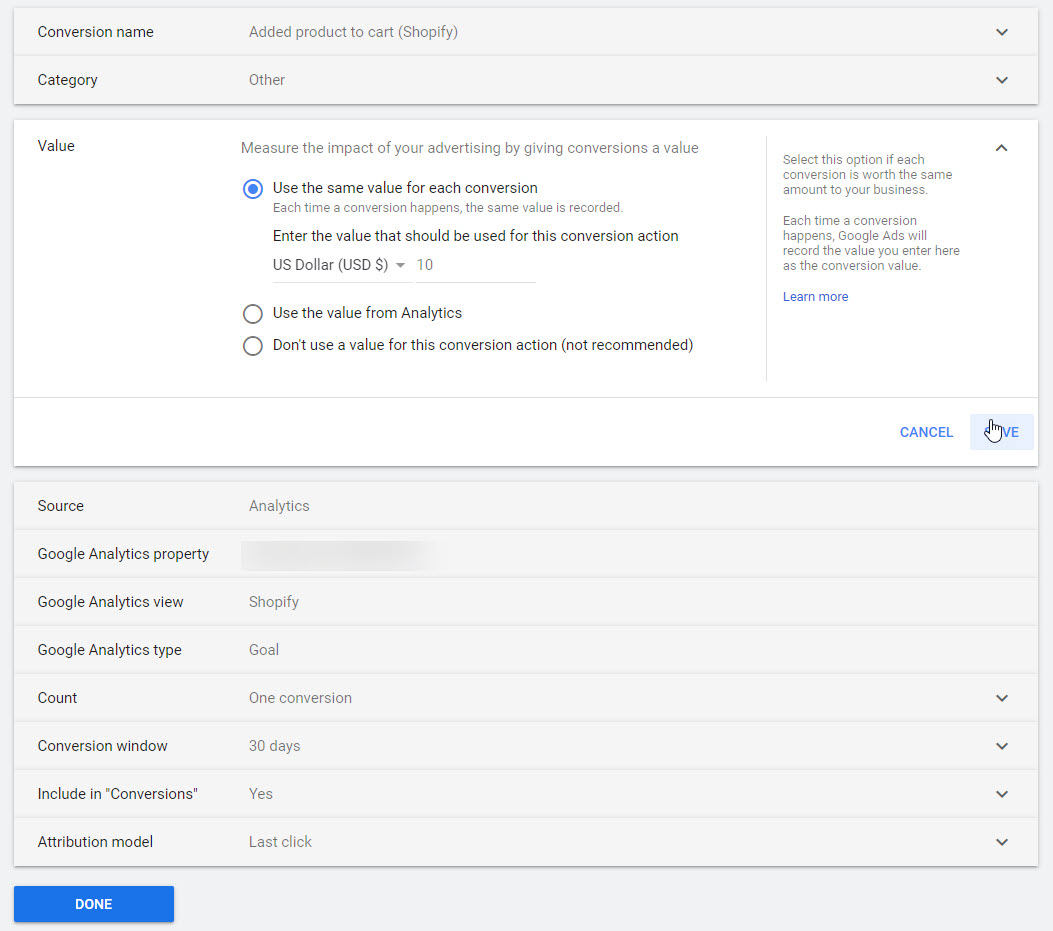
Now we need to make some changes to the settings. I recommend adding value and change the attribution model.
The value of the conversion can be anything. First, you need to calculate yourself, how much is a click for this action worth? Then add this value.
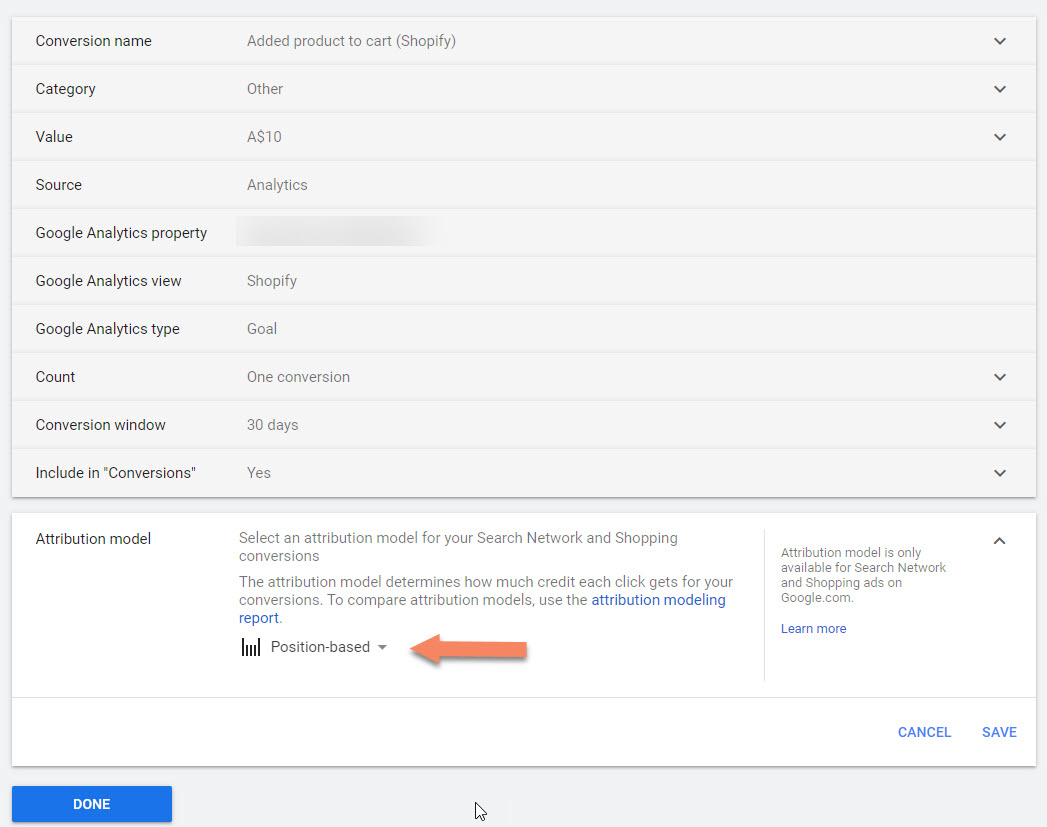
The attribution model should be changed from the last click to any other model. I recommend for growth purposes to use position-based. You can read more about Google Ads attribution model.
You have now completed all the steps to add a micro-conversion.
Repeat these steps for the following destinations:
- Added address
- url: /checkout/contact_information
- Added shipping info
- url: /checkout/shipping
- Added payment info
- url: /checkout/payment
- Searched
- url: /search
The Last Step
The last step is to track add-to-cart clicks. To enable this, we first need to install Google Tag Manager, optionally also install Google Analytics 4.
Once you have installed and enabled Google Tag Manager using the above article, we can implement the final goal.
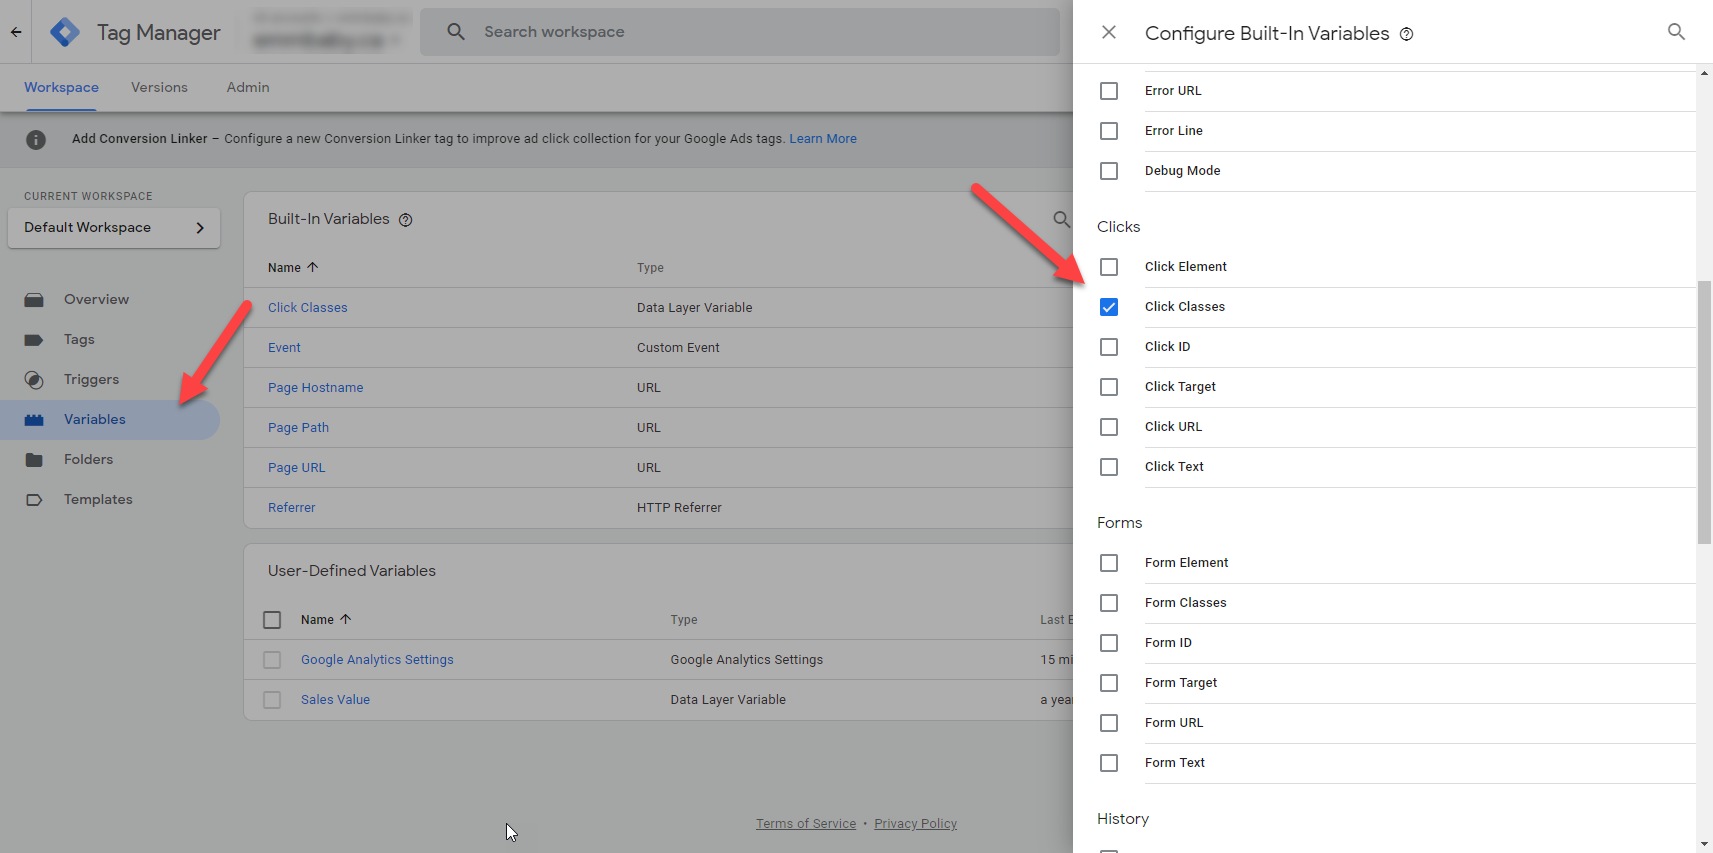
Go to your Google Tag Manager Account and click on Variables > Configure > And enable Class clicks.
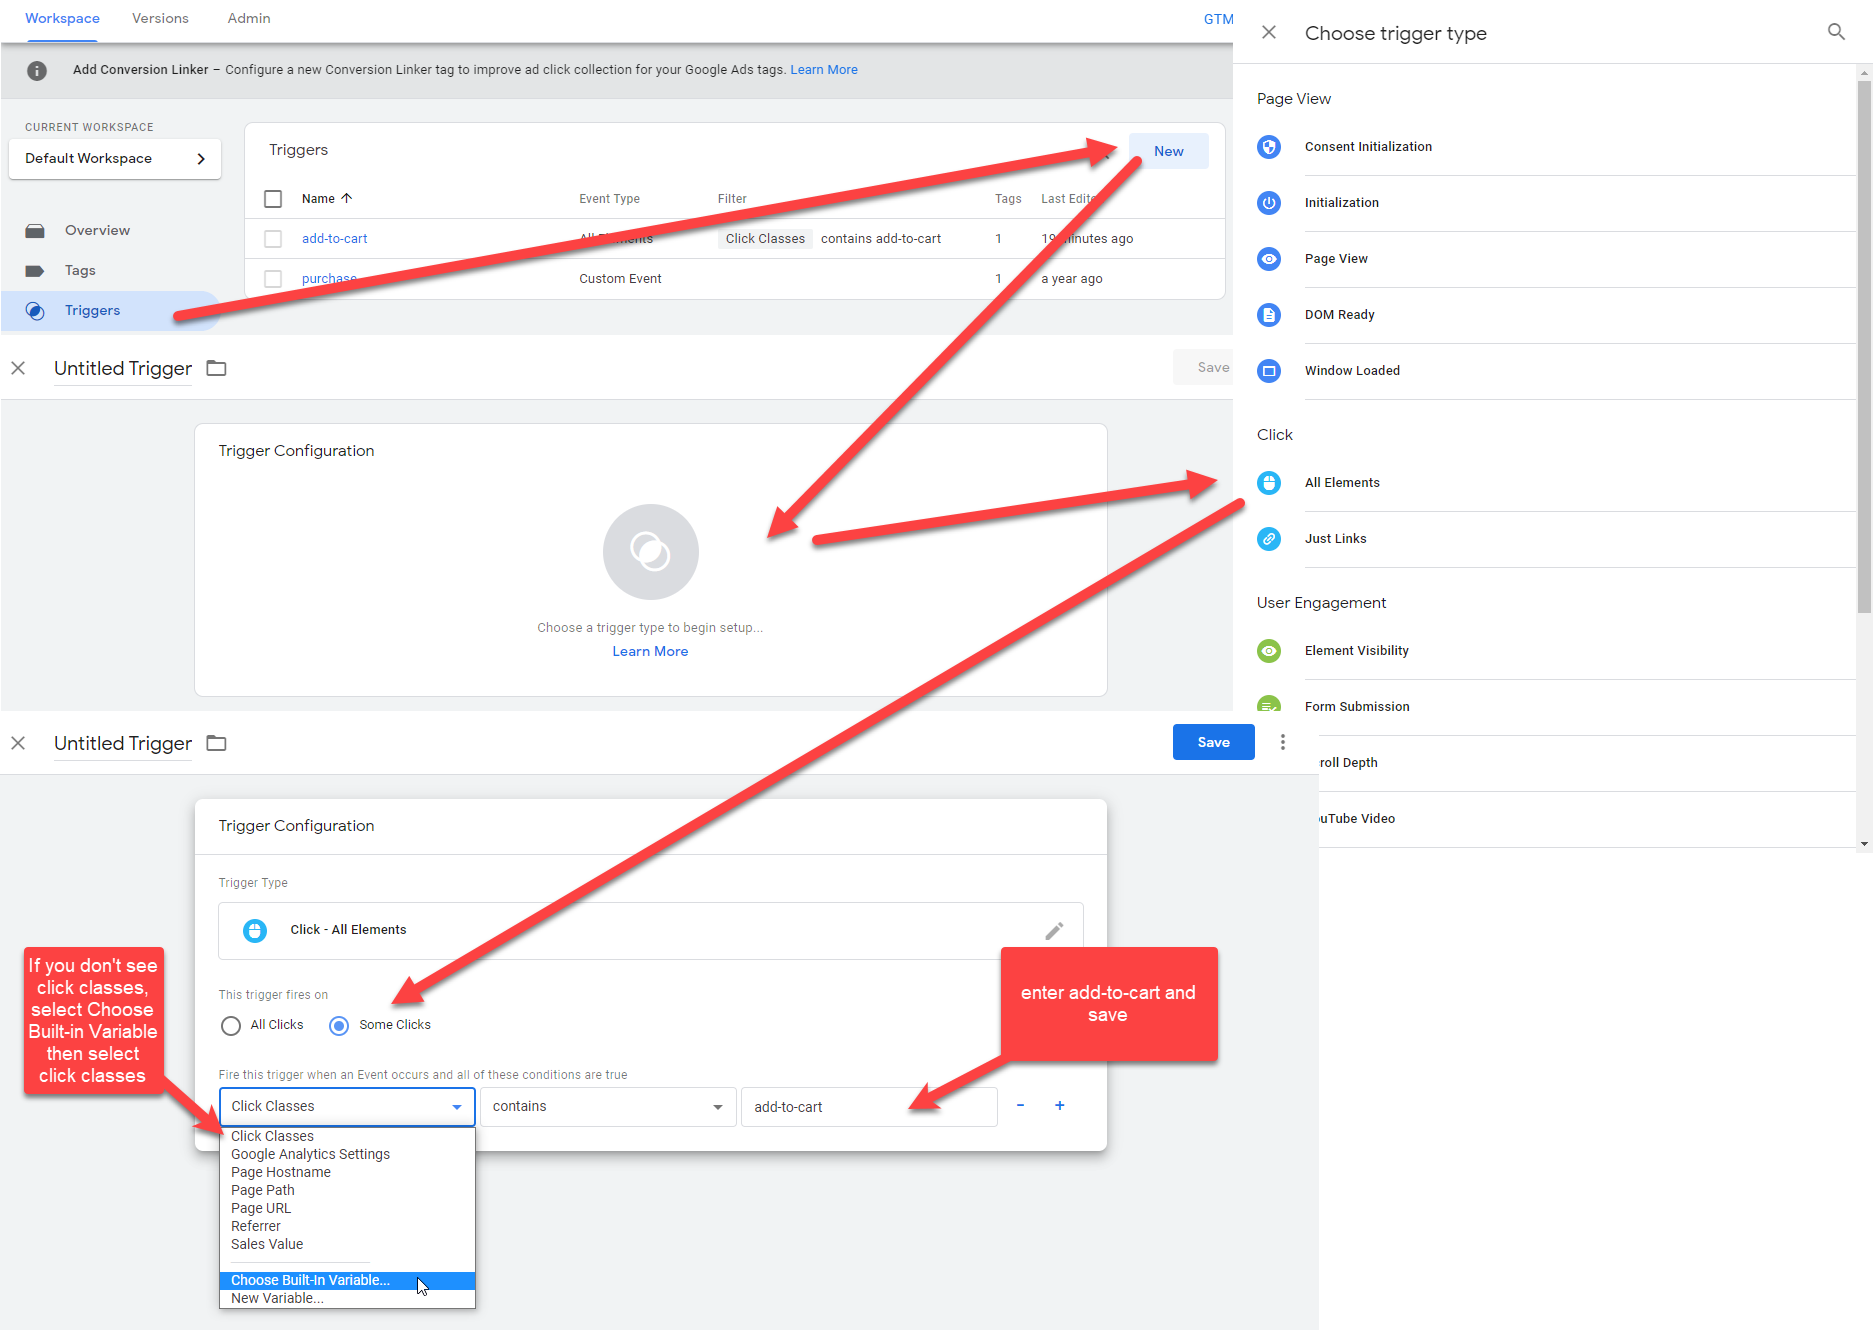
Now go to Triggers > New > Trigger Configuration > All Elements > Choose Some clicks and select Click Class as your event.
Keep contains and enter add-to-cart in the input box and save the trigger.
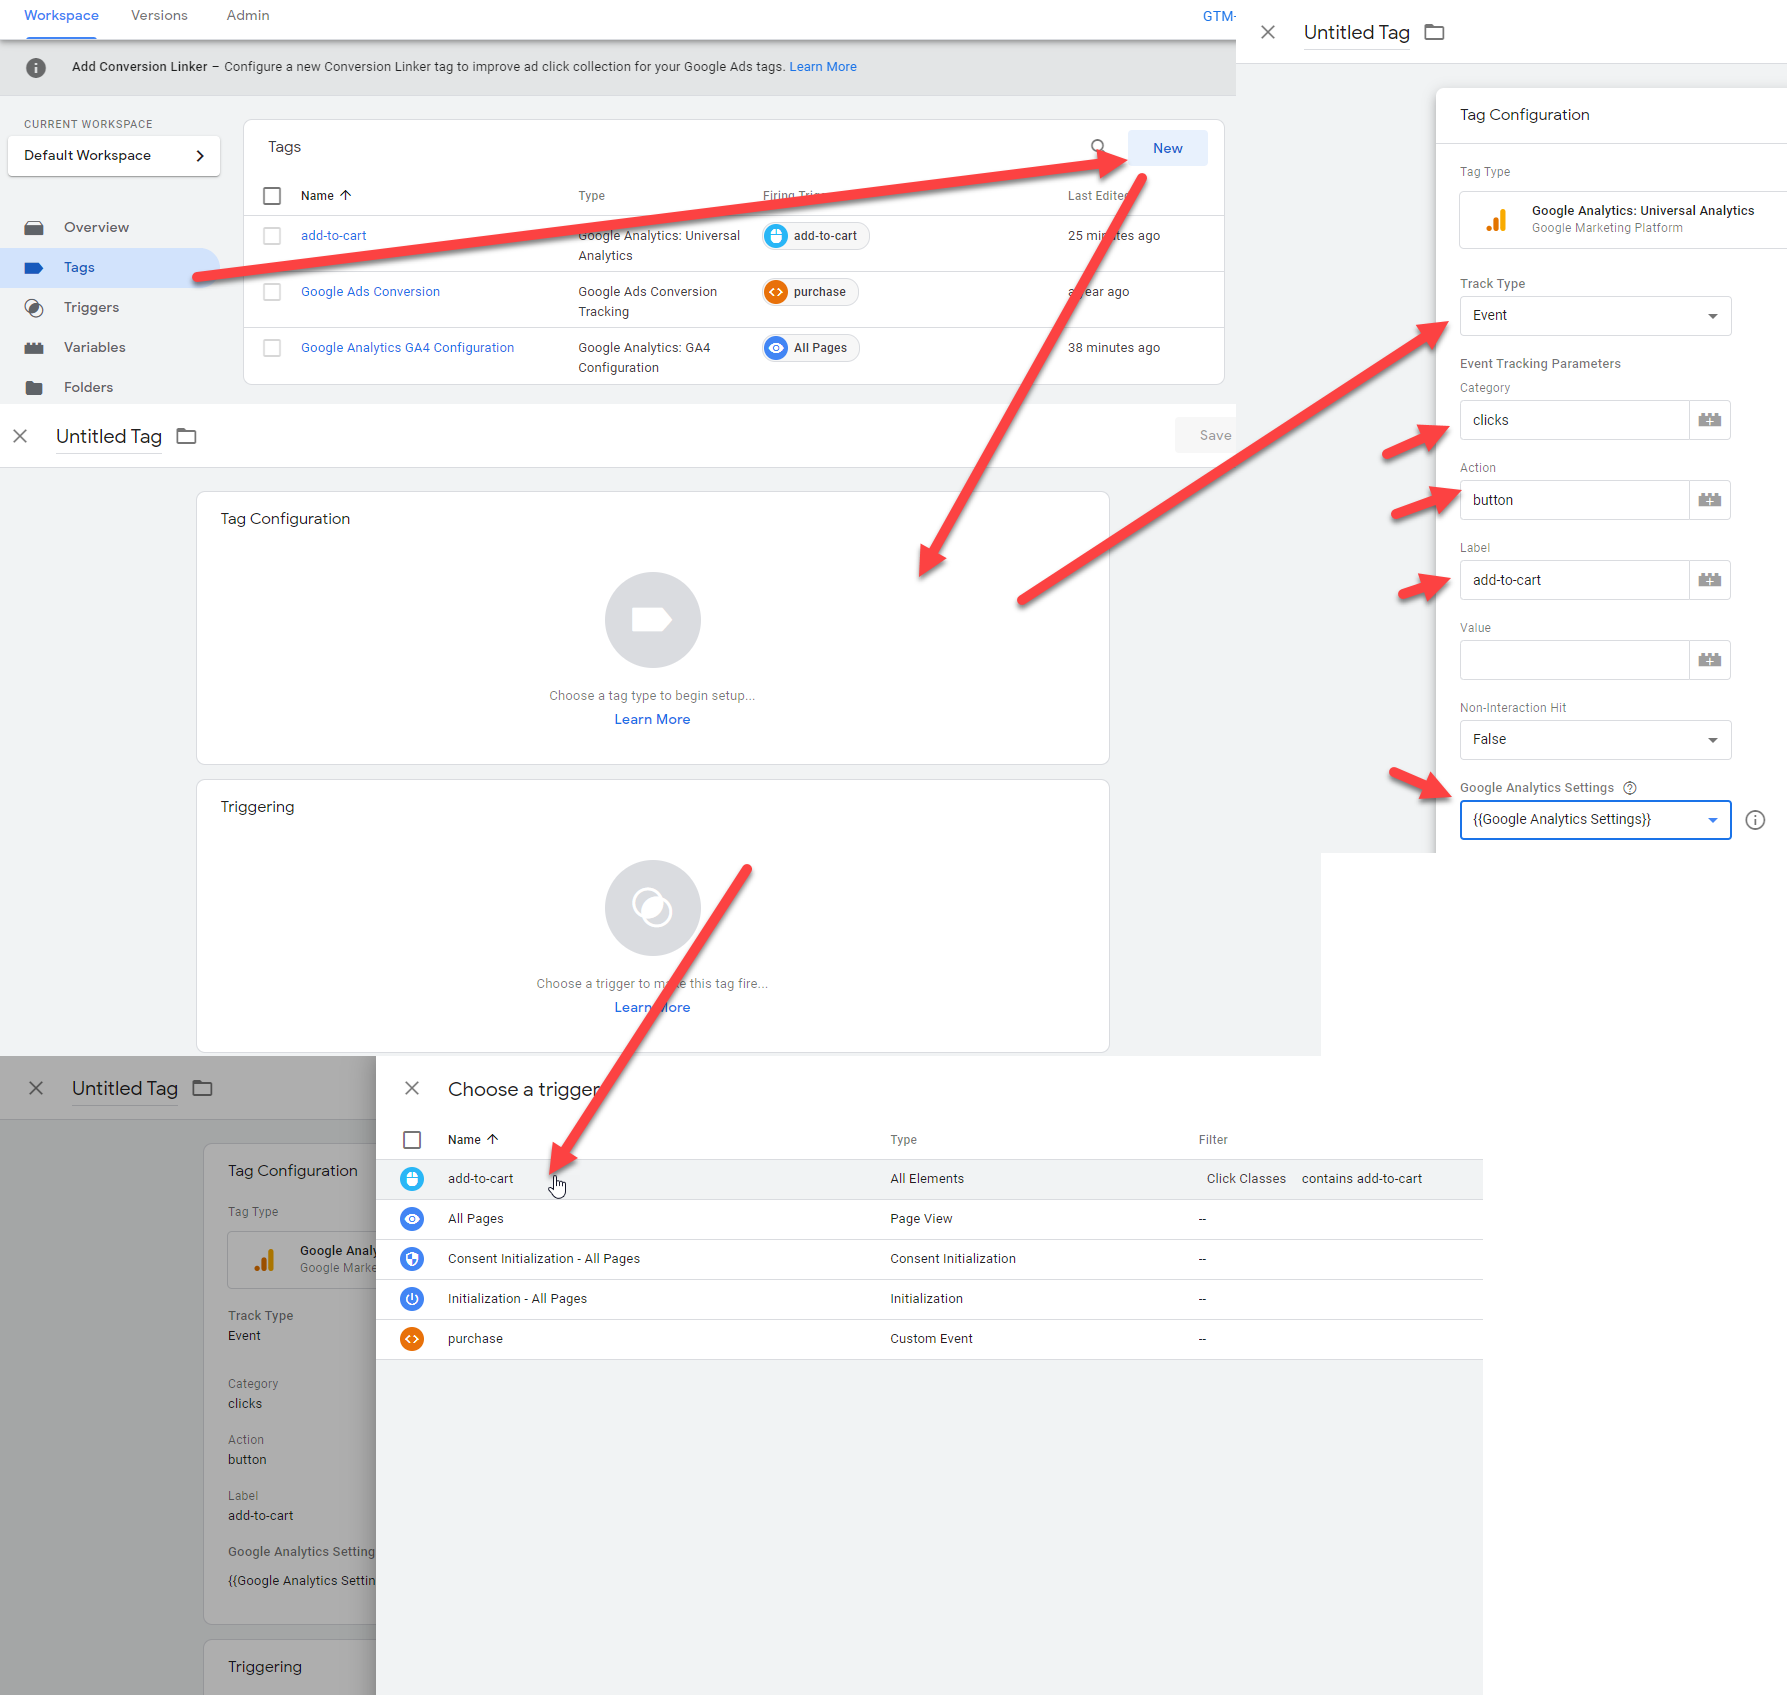
Now create your tag by going to Tags > New > Tag Configuration
- Select Track Type: Event
- Enter the category: clicks
- Enter the action: button
- enter the label: add-to-cart
- And select your Google Analtyics account
- Save the tag
Now you can publish your container.
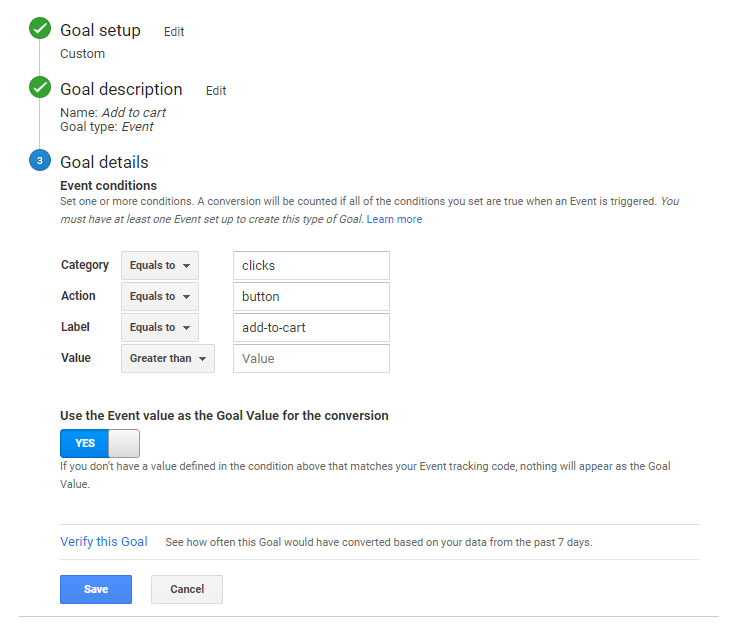
The final step is to create the final goal in Google Analytics. Then, follow the previously mentioned steps.
And instead of the destination, choose an event.
Let’s add the event conditions, and click on save.
- Category: clicks
- Action: button
- Label: add-to-cart

Your final step is to import the goals in Google Ads, as demonstrated earlier.
Enable Remarketing
Track your existing website visitors by installing remarketing for Shopify. A returning visitor is twice as likely to convert than a first-time visitor. Use this data for display remarketing ads and audience targeting.
Enable Conversions With Enhanced Conversions
Easily install conversion tracking in Shopify with one code.