


Add Google Ads conversion tracking to Shopify quickly. Choose from three versions:
- Additional Scripts: Deprecated but still installable.
- Shopify Pixel: Direct installation with Google Ads, excluding enhanced conversions.
- Shopify Pixel with Enhanced Conversion & Micro Conversions + GA4: Available when installing via Google Tag Manager.
The Shopify Pixel Code is compatible with Shopify checkout extensibility.
Please note that users checking the code with Tag Assistant or developer tools will not be able to see the code, as Shopify pixels run in sandbox mode, which is not viewable.
Please also note that if you are installing this with Google Analtyics 4, that you will not be able to view the debug mode in GA4. But you can view the realtime data to verify it’s tracking.
Enhanced conversions will be reflected in the status details within a week, depending on your sales volume.
V2 Shopify Pixel + Enhanced Tracking + Micro Conversions + GA4

What is New?
- V1.05+ now supports cart data, for using cost of goods based bidding strategy in Google Ads
- V1.07+ now supports micro conversions + bug fixes
- V1.08+ now supports Google Analtyics 4 (optional)
- V2+ now supports remarketing & remove from cart
What is the difference between Micro and Macro Conversions?
When it comes to advertising, we have two types of conversions. Macro and Micro conversions. Macro conversions are the website’s primary conversions, such as completing an order or submitting a lead form. Micro conversions are smaller actions such as add to cart, view cart, add a delivery address, etc.
Requirements
You need access to the following accounts.
- Google Tag Manager
- Google Ads
- Google Analytics 4
- Shopify (Customer Events)
Let’s get started!
If you have not yet created a Google Tag Manager account, create one now.
Once the account is created, you should see a popup with your GTM tag, if you don’t see this, don’t worry, simply go to Admin > Install Google Tag Manager


Copy the tag id without GTM- as highlighted in the image below


Replace the following values in the settings:
- GOOGLE_TAG_MANAGER_ID
- Add your GTM tag ID
- GOOGLE_MERCHANT_CENTER_ID
- Add your Google Merchant Center account ID
- PRODUCT_COUNTRY_CODE
- Set your default country ISO2 code, for usage in product IDs
- ESTIMATED_SHIPPING_TIME
- Add your estimated shipping time
- GRANT_CONSENT
- Defaulted to false, if you set it to true, you are forcing to set consent_mode v2 to true, regardless what the use selected (not recommended)
- ID_TYPE
- Set your Google Merchant Center product ID format
- CAPITALIZE_SKU
- If you are not using the default Shopify IDs and you are using SKUs, you can choose to uppercase the value
In the code replace GTM-123456 with your GTM tag ID
You can get the code by registering here: https://merchantcodex.com/advanced-google-ads-tracking-for-shopify/
Go to Shopify > Settings > Customer Events

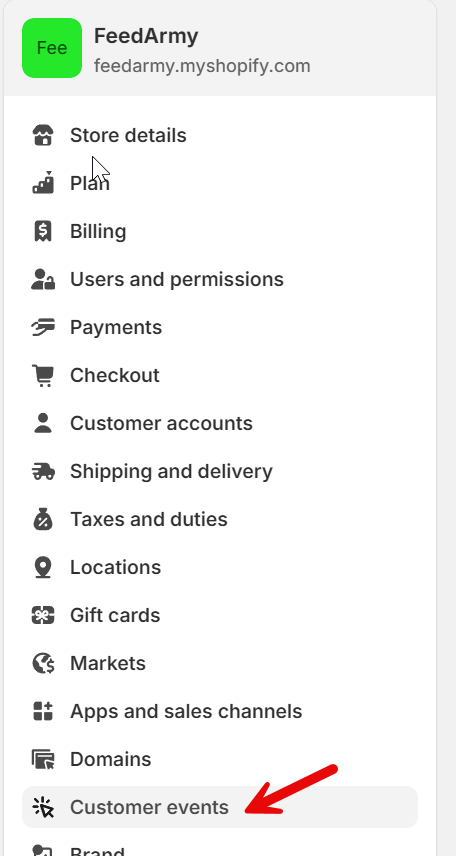
Click on add custom pixel


Paste your code, click on save and then connect.
In Google Tag Manager, go to admin > and click on import container.


GTM JSON File
In Google Tag Manager select the json file (you can find it in the downloaded file).
Chosing your workspace, click on existing and choose default workspace
Select Merge as the import option


Click on confirm


Go to Workspace > Tags > Click on Google Ads Shopify Pixel [Purchase] Tracking By FeedArmy


Hover over the tag and click on edit


Add your Google Ads conversion ID and Label when creating a new conversion.


In Google Ads go to Goals > Summary > Click on New Conversion Action


Select website
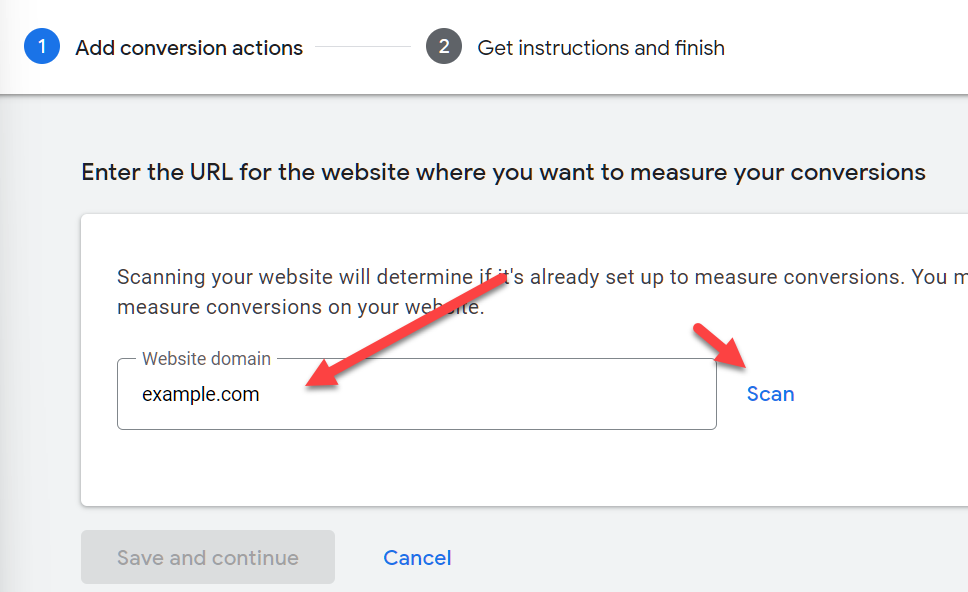
Enter any website domain, and click on scan
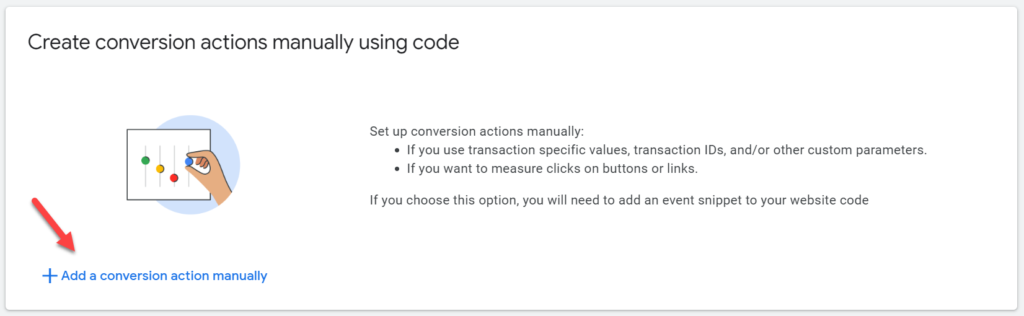
Scroll to the bottom of the page and click on Add a conversion action manually

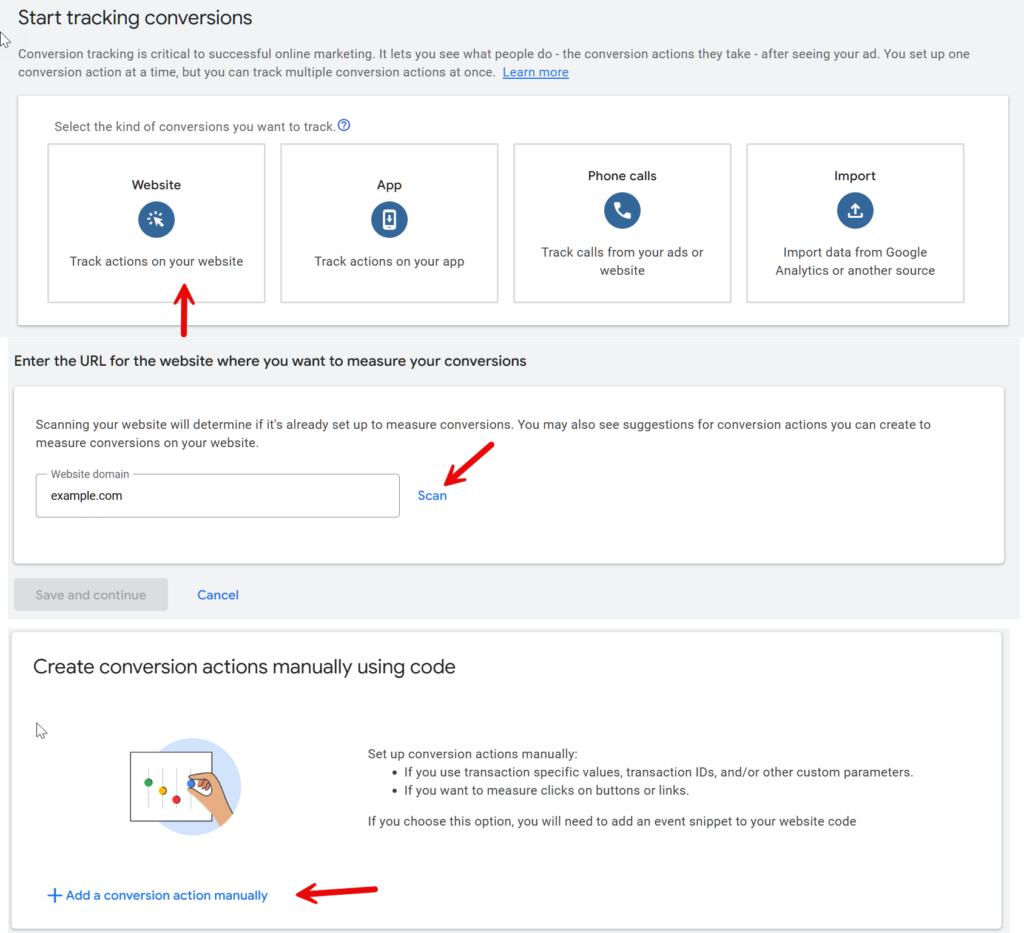
Add your conversion action details:
For Goal and action optimization select purchase
For Conersion name, add any name, I recommend Shopify GTM Pixel
For the Value select Use different values for each conversion
Click on Done, then click on save and continue


Select Google Tag Manager and copy your id and label from Google Ads and paste it in Google Tag Manager


Now repeat the steps for the micro tracking (optional) (view the instructions video for more details) and ensure everything is set to secondary as goal, unless you know what you are doing:
- Add To Cart
- Remove From Cart
- Cart Viewed
- Begin Checkout
- Add Shipping Info
- Payment Submitted
- Search
- View Collection
Save the tag, and now lets publish the GTM container by clicking on Submit


Add a version name and click on publish


Let’s enable enhanced conversions in Google ads by clicking on done, then select your conversion action and click on ehanced conversions.
Check the box next to Turn on enhanced coversions
Check the radio button for Google tag or Googel Tag Manager and select next
Enter just a letter d, and click on check URL, as we want to force an error.
We can now click on select one manually


Click on Google Tag Manager > Next and click on save

Google Ads Remarketing
To enable the Google Ads Remarketing setup, we only need to copy the Google Ads conversion ID. You can find this by going to Goals > Select any website conversion action, such as the ones you just created, and copy the id.


And paste the conversion ID in the remarketing tag inside Google Tag Manager.


Google Analytics 4 Setup
Continue GA4 Installation: We now need to add our Measurement ID
- Tags:
- Google Analytics 4 Data
- Google Analytics 4 Page View


You can find your Google Analytics Measurement ID by going to:
- Google Analytics
- Cog Icon (admin)
- Under Data collection and modification, choose Data Streams
- Click on your data stream
- Now you can view and copy your measurement id


Now click on both tags, and add replace the G-1234 that I added, with your own measurement ID.


Support My Work!
https://www.trustpilot.com/review/feedarmy.com
or here : https://g.page/r/CbGZ-JICOoh1EAg/review
Trouble Shooting
Can Not See Data Layers
Because Shopify pixels run in sandbox mode, for privacy reasons, you cannot view data layers in your browser using conventional tools.
You will need to use a Chrome extension such as https://chromewebstore.google.com/detail/datalayer-checker-plus/blglfmihmnbhfgfbomofeljmididgfhe
Even then, it is only sometimes 100% working.
Zero Tracking
If nothing is working, even adding to the cart, that signals more serious issues. This means there is possibly a third-party app blocking pixels from working.
It’s also possible that your cookie consent is not enabling tracking, you can test by forcing the consent to be set as accurate in the code settings.
Some Conversions Are Tracking
If you notice that not all conversions are tracked in Google Ads, this signals that the payment method you are using is not sending back the correct data to Shopify. This is a known issue with third-party payment methods, even with the old additional script method.
Conversion Not Working
If your conversions are not working, then most likely your theme checkout and thank you page are not published.
Go to Shopify > Online Store > Themes > Click on Customize


Click on the home page drop down and select Checkout and new customer accounts
Click on checkout drop down and choose thank you and or checkout (whichever says unpublished)
Click on the sections button and publish.

You can also check if your checkout domain matches your domain. In some cases the domain name is myshopify.com instead of your domain.
Google Analytics Average Engagement Time Per Session
When using Shopify Pixels / Customer Events, and due to Shopify using sandbox environment, automatic events, including engagement event for Google Analytics aren’t triggered.


Change Log
- 18 January 2025: V2.0026 Updated remarketing tags (they where not complete before)
- 29 October 2024: V2 Includes remarketing, remove from cart micro conversion.
- 6th October 2024: V1.0816 Fixed purchase report issue in GA4 (just update the pixel code in Shopify)
- 2nd September 2024: v1.0814 Fixed the pixel code to correctly show the item_id instead of the id (For GA4).
- 2nd September 2024: V1.0813 Fixed an issue with event naming convention
- 25th August 2024: V1.08+ now supports Google Analytics 4
- 8th August 2024: V1.07+ now supports micro conversions + bug fixes
- 16th July 2024: Updated GTM enhanced conversion data to be lowercase, as per documentation and highlighted by Lowie Verschelden
- 14th July 2024: Added V1.05 cart data, so that you can use Google Ads cost of goods based bidding.
- 18th June 2024: Added conditional checks for enhanced data to avoid listing empty values
- 10th June 2024 : Updated GTM Container, incorrect mapping of some variables (to update please delete all variables in GTM, and re-import with merge option)
V3: Local Inventory Feed Support
Version 3 includes everything from Version 2, plus full local inventory feed support for Google Merchant Center.
You can get the code here. Begin by adding the code to Shopify, then follow the Version 2 steps before updating your local settings as shown below.

Local Settings Setup
Add your local configuration values in the pixel code:
const LOCAL_TARGET_COUNTRY_CODE = 'US';   // ISO2 country code (e.g. "GB" for United Kingdom)
const LOCAL_LANGUAGE = 'en';              // Alpha-2 language code (e.g. "de" for German)
const LOCAL_STORE_CODE = '1234';          // Google Business Profile store code
- Country Code (ISO2): If unsure, search online (example: United Kingdom ISO2 code =
GB). - Language Code (Alpha-2): Again, search online if needed (example: Germany alpha2 code =
de). - Store Code: Your Google Business Profile store code.
Upgrading from Version 2
- If you are already using Version 2, upgrade to Version 3 by importing the V3 update file in Google Tag Manager.
- If you have never installed FeedArmy tracking before, follow the Version 2 tutorial first. Once complete, continue with the V3 setup.
Be sure to save your Shopify pixel once all changes are applied.
Once installed and you have waited 2 days, fill out this form: https://support.google.com/merchants/contact/website_reported_product_feeds#
To get your API Key.
Full Documentation: https://support.google.com/merchants/answer/15845643
Shopify Pixel

This Shopify Pixel / Customer Event code, has been tested and verified as working for Shopify merchants that have enabled Checkout Extensibility.
The first step is to get your conversion id and label.
Log in to Google Ads and go to Goals > Conversions > Summery

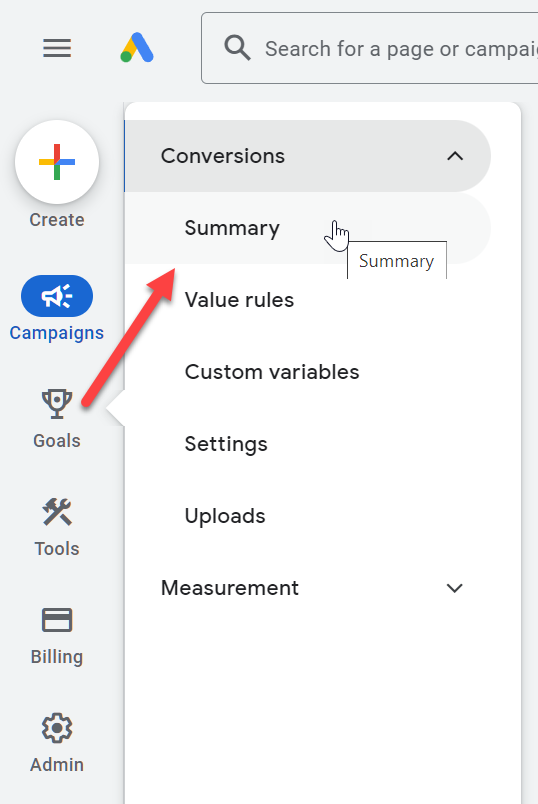
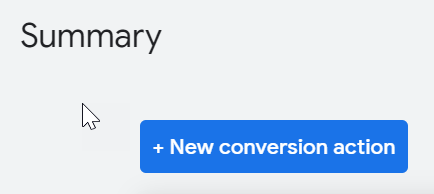
Click on the blue button that says + New conversion action

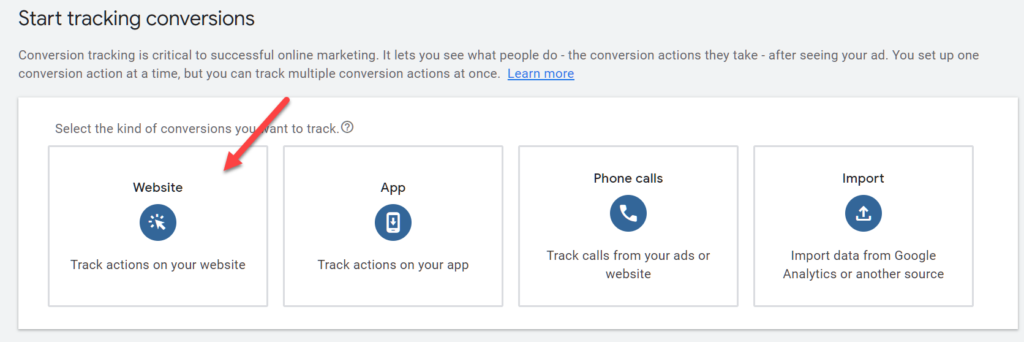
Select Website as your conversion method.

Enter your website address, and scan.

If you see a banner that says to use Google Analytics, then click on Use Google Ads only


Click on +Add conversion action manually.

- Choose Purchase as your Goal and action optimization
- Enter any conversion name, I will call it Shopify Pixel
- Select Use different values for each conversion
- Leave the rest unchanged and click on done

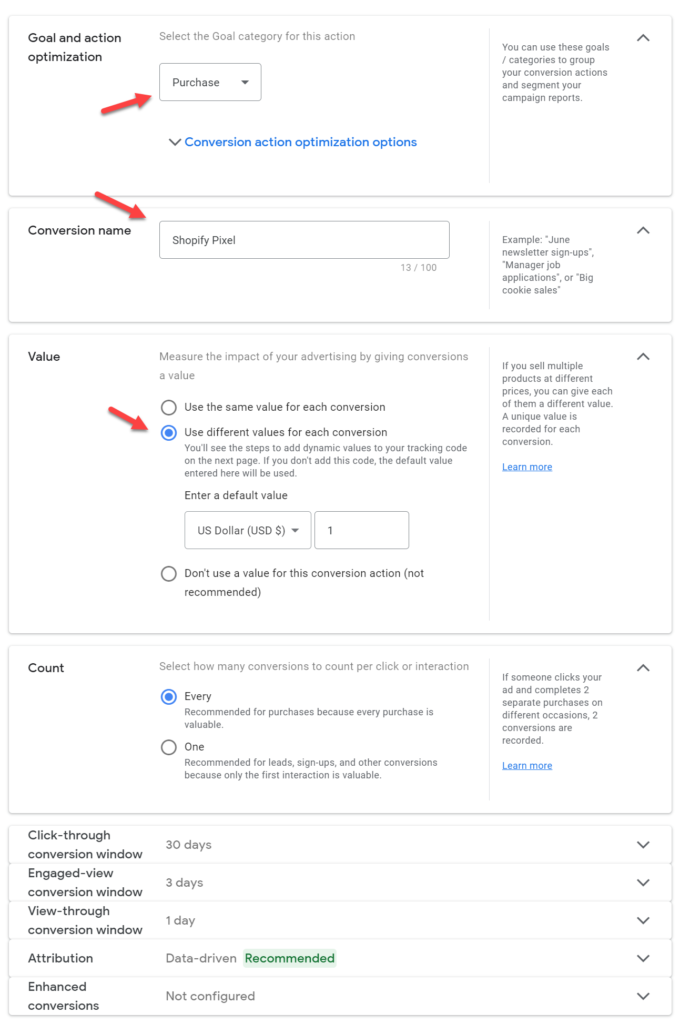
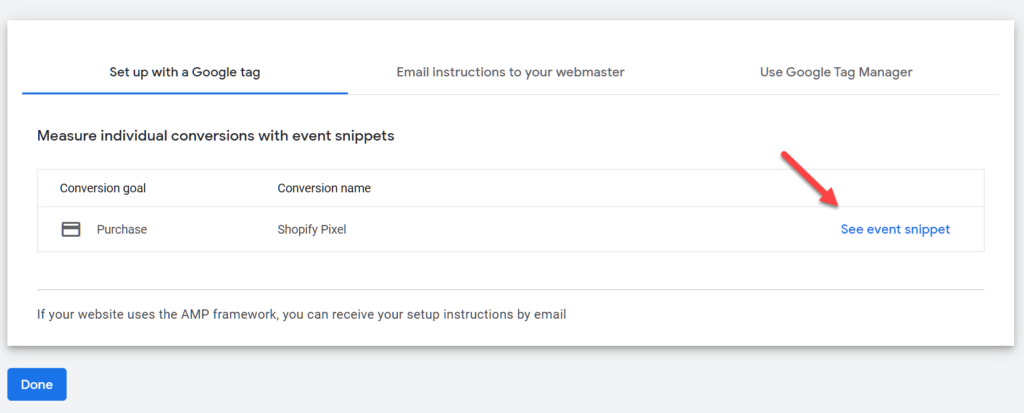
Click on See event snippet

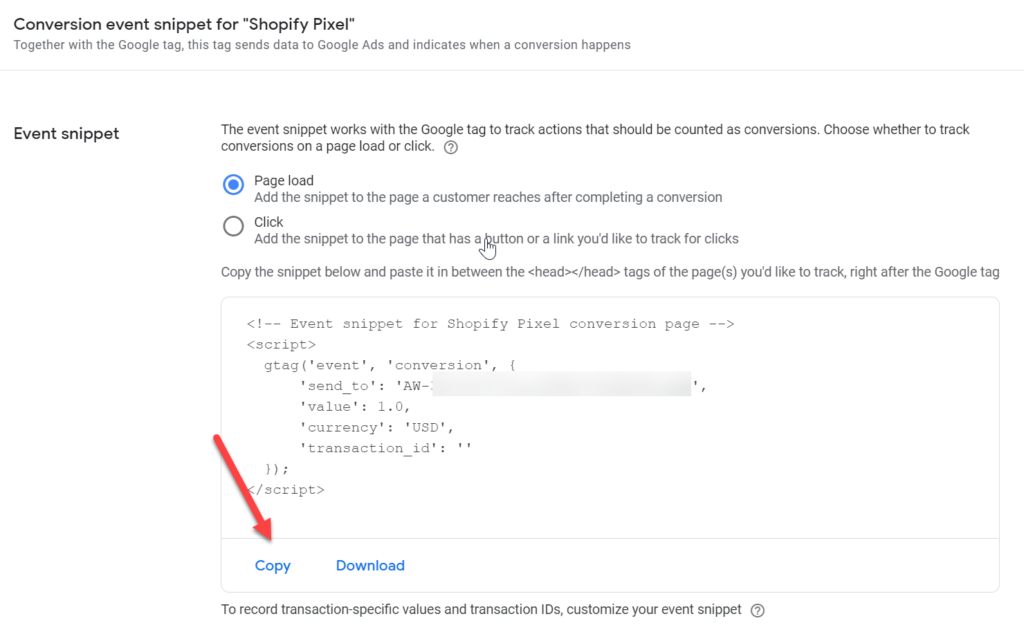
Copy the code and paste in a temporary text file, we will copy some details at a later stage.

Click on Done.
Now go to Shopify > Settings > Customer Events
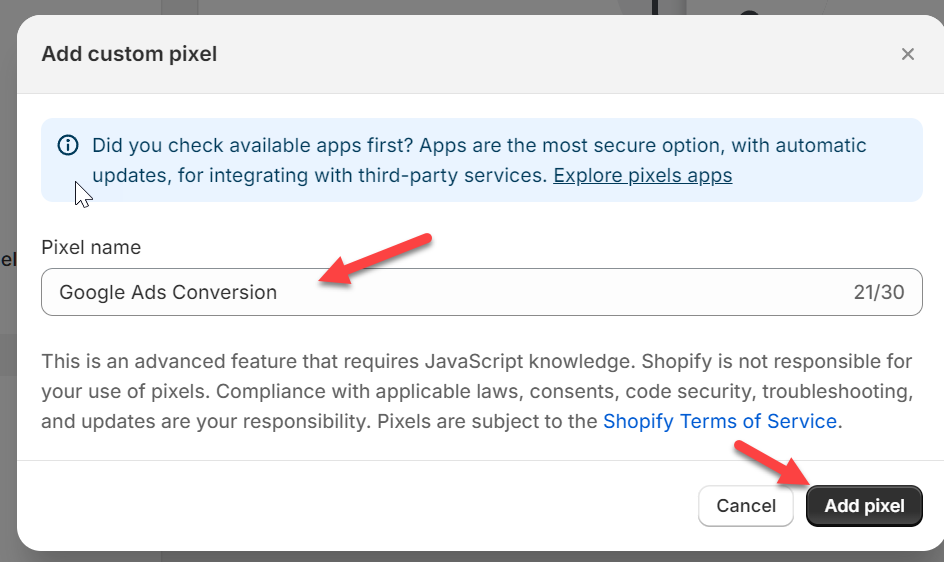
And click on Add custom pixel

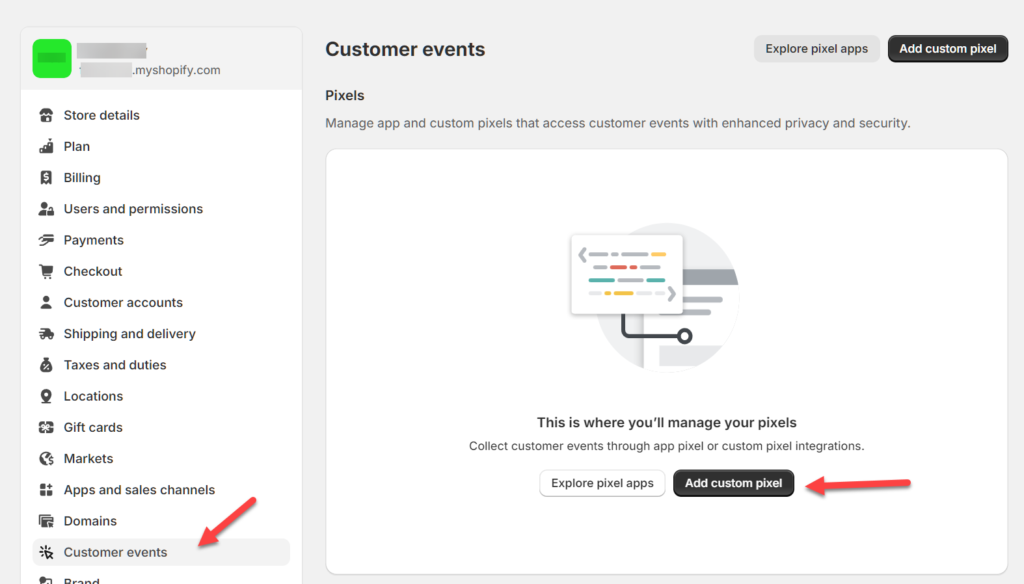
You can give it any pixel name, but I will call it Google Ads Conversion. Now click on Add pixel.

When editing the code below, please do not remove or change the author, and respect who built it.
// Created by FeedArmy V1.04
Paste the below code in the Shopify pixel.
// Created by FeedArmy V1.05
const script = document.createElement('script');
script.setAttribute('src', 'https://www.googletagmanager.com/gtag/js?id=AW-123456789');
script.setAttribute('async', '');
document.head.appendChild(script);

window.dataLayer = window.dataLayer || [];
function gtag(){dataLayer.push(arguments);}
gtag('js', new Date());
gtag('config', 'AW-123456789', {'allow_enhanced_conversions':true});

analytics.subscribe("checkout_completed", (event) => {
  gtag('set', 'user_data', {
    email: event.data?.checkout?.email,
    phone: event.data?.checkout?.phone,
    address: {
      first_name: event.data?.checkout?.shippingAddress?.firstName,
      last_name: event.data?.checkout?.shippingAddress?.lastName,
      street: event.data?.checkout?.shippingAddress?.address1,
      city: event.data?.checkout?.shippingAddress?.city,
      region: event.data?.checkout?.shippingAddress?.province,
      postal_code: event.data?.checkout?.shippingAddress?.zip,
      provinceCode: event.data?.checkout?.shippingAddress?.provinceCode,
      country: event.data?.checkout?.shippingAddress?.country,
      countryCode: event.data?.checkout?.shippingAddress?.countryCode,
    }
  });

  gtag('event', 'conversion', {
    send_to: 'AW-123456789/abcdefg123456789',
    transaction_id: event.data?.checkout?.order?.id,
    value: event.data?.checkout?.subtotalPrice?.amount,
    currency: event.data?.checkout?.subtotalPrice?.currencyCode,
  });
});
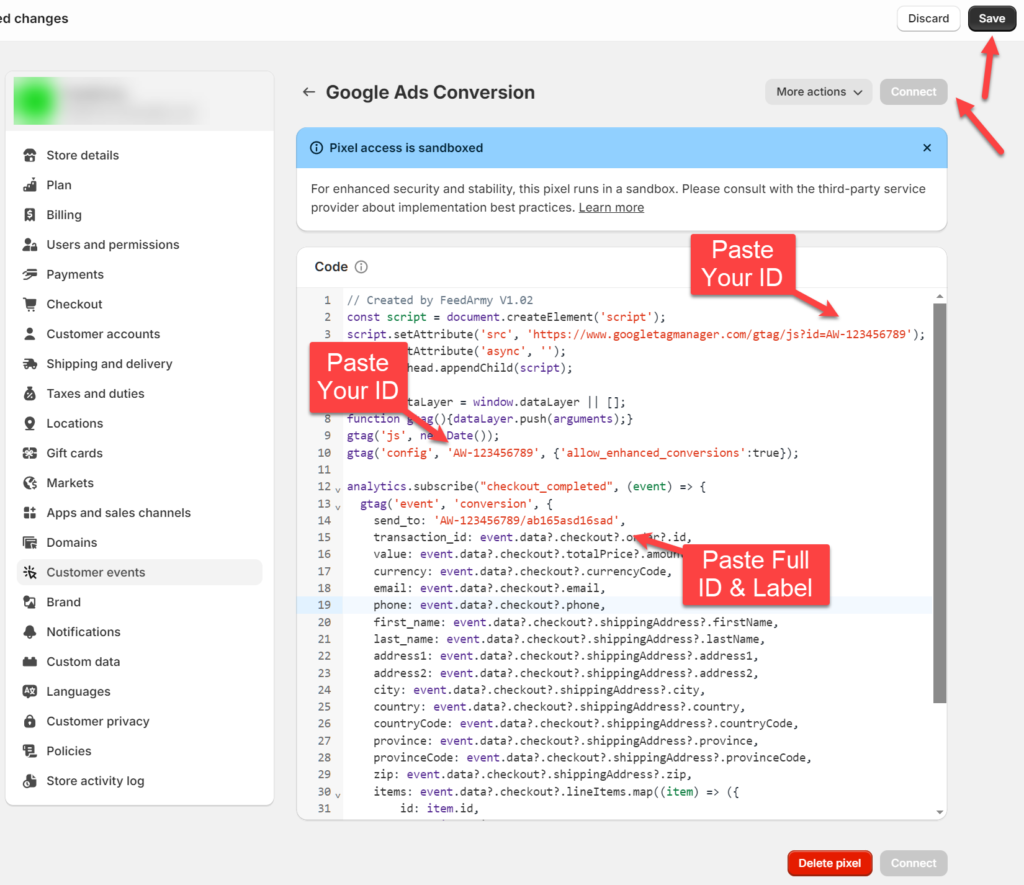
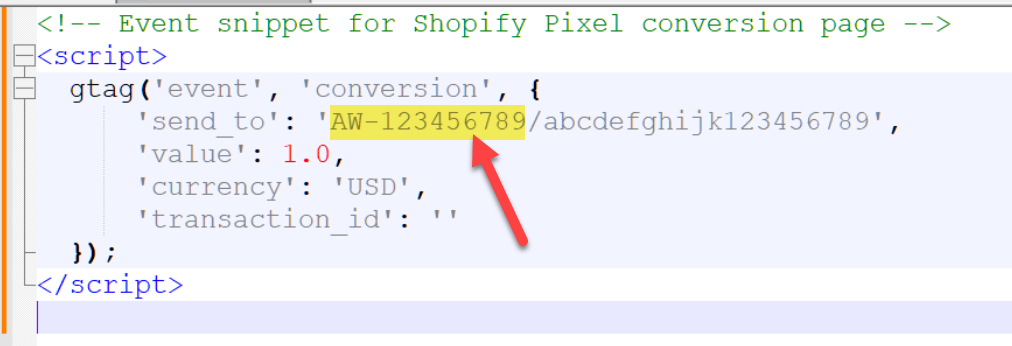
From your previously copied code from Google Ads, copy the AW-123456789 id highlighted in the image below.

And paste it twice on row 3, and row 10, by replacing the existing ID AW-123456789 (shown in red in the image above)
Go back to your Google Ads code and now copy the full ID and Label as highlighted in the image below.
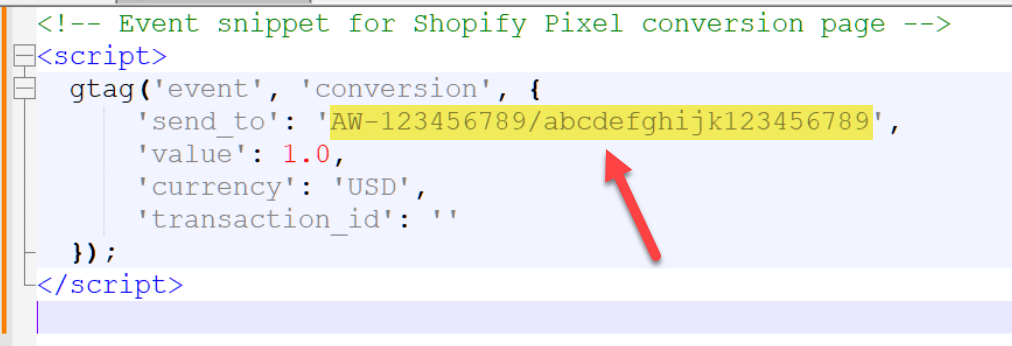
Replace the send_to value between the quotes on row 14. (shown in red in the above image)
Now click on save in the top right corner followed by clicking on Connect, accept Shopify terms and conditions. And you are all done.
Testing
You can’t test code on Shopify’s checkout thank you page because it’s in sandbox mode, meaning tools like Google Tag Assistant or GTM Preview Mode won’t work. If you want to check data layers, you need to use a chrome extension such as https://chromewebstore.google.com/detail/datalayer-checker-plus/blglfmihmnbhfgfbomofeljmididgfhe
Change Log
- V1.05 – 20 May 2024: Changed the order of gtags
- V1.04 – 20 May 2024: Added user_data values after Sve (comment below) confirmed Google’s own version. I already built this months ago, but needed confirmation it’s correct.
- V1.03 – 02 March 2024 : Supports multicurrency and used subtotal price instead of total
- V1.02 – 27 February 2024 : Public Release