


Get The Google Ads Remarketing Code
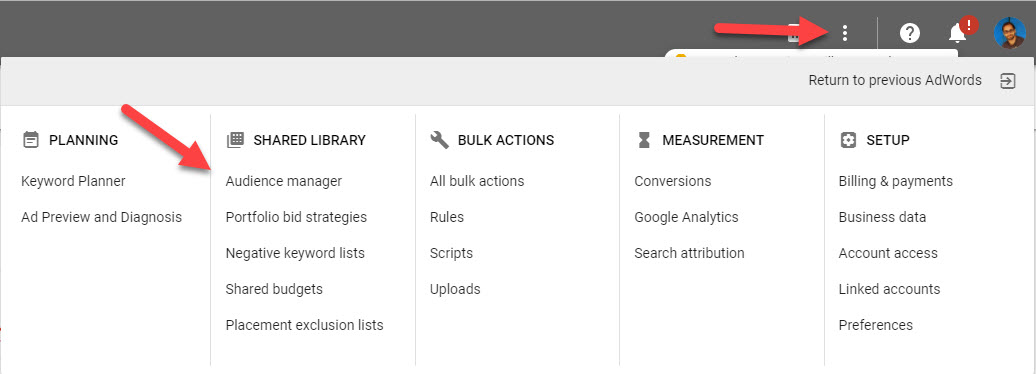
Login to Google Ads, then in the top right corner click on the 3dot menu and select Audience Manager from the Shared Library section
If you already have a remarketing code, skip this section and go to the next section with continue here.
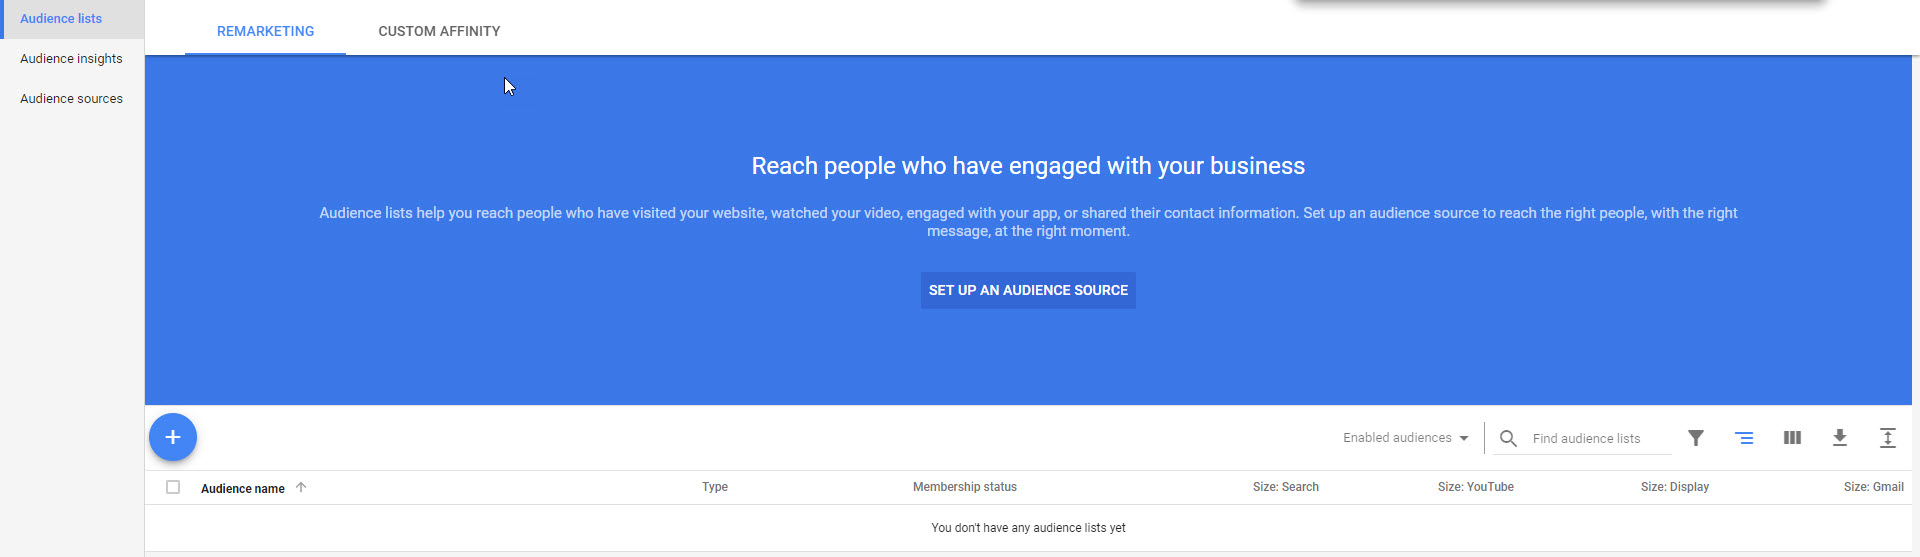
Click on setup audience list
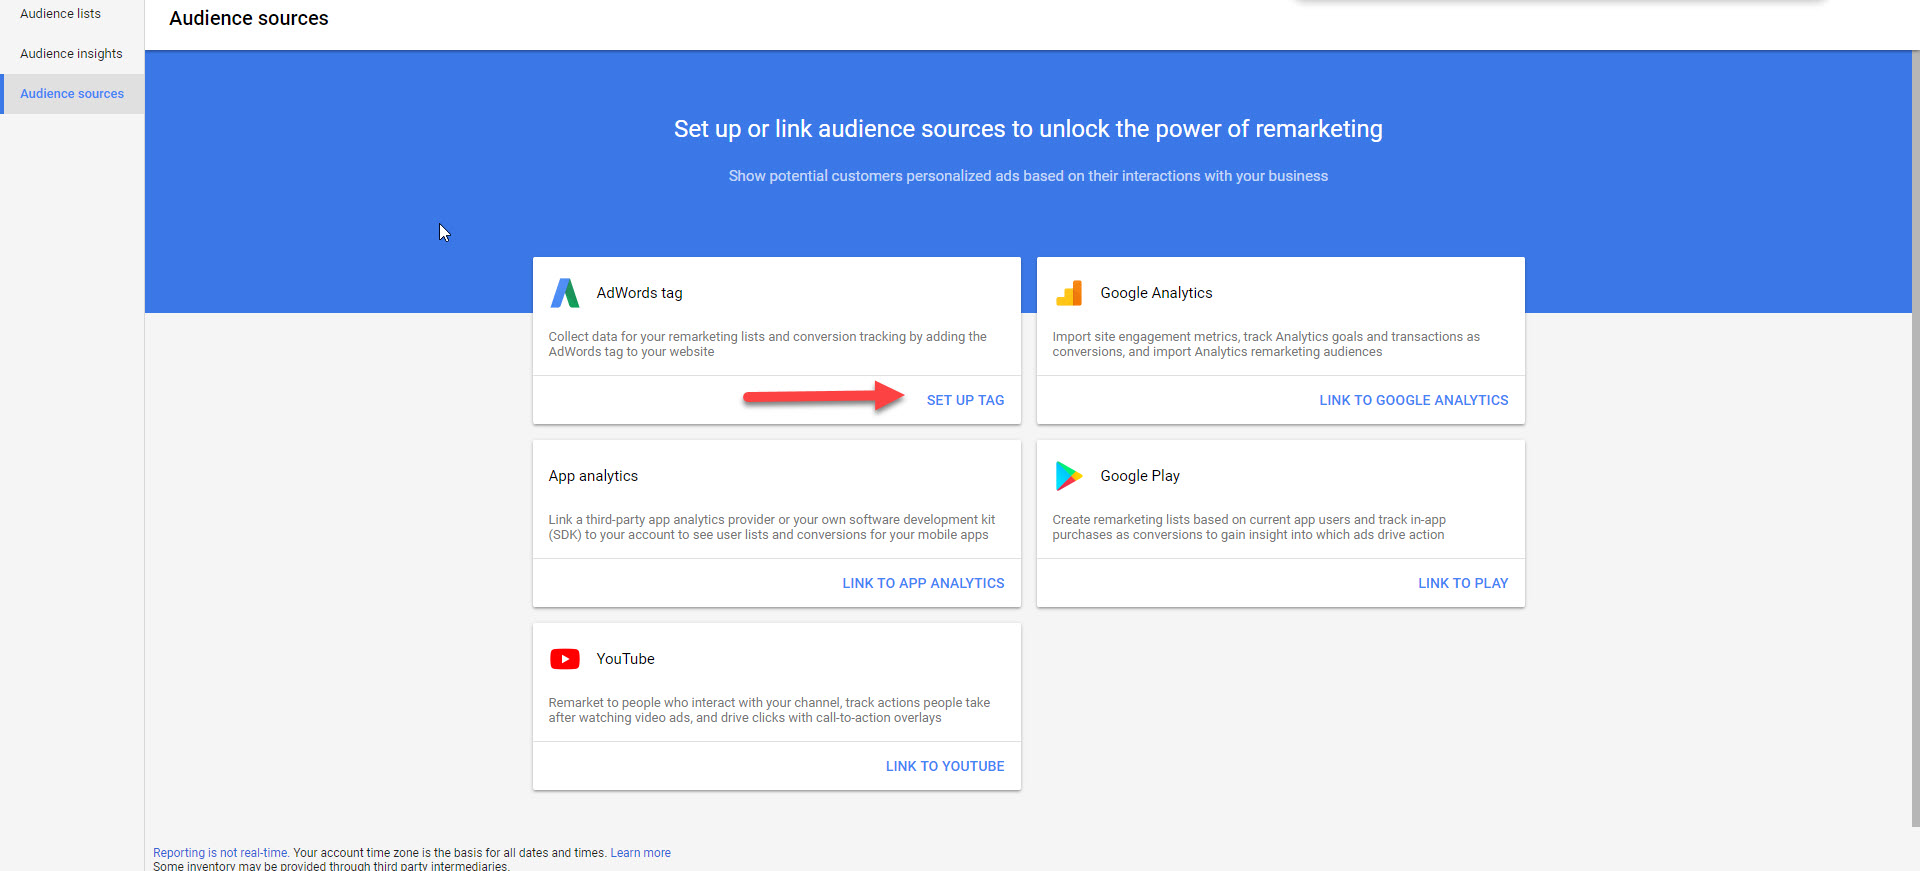
Then click on setup tag
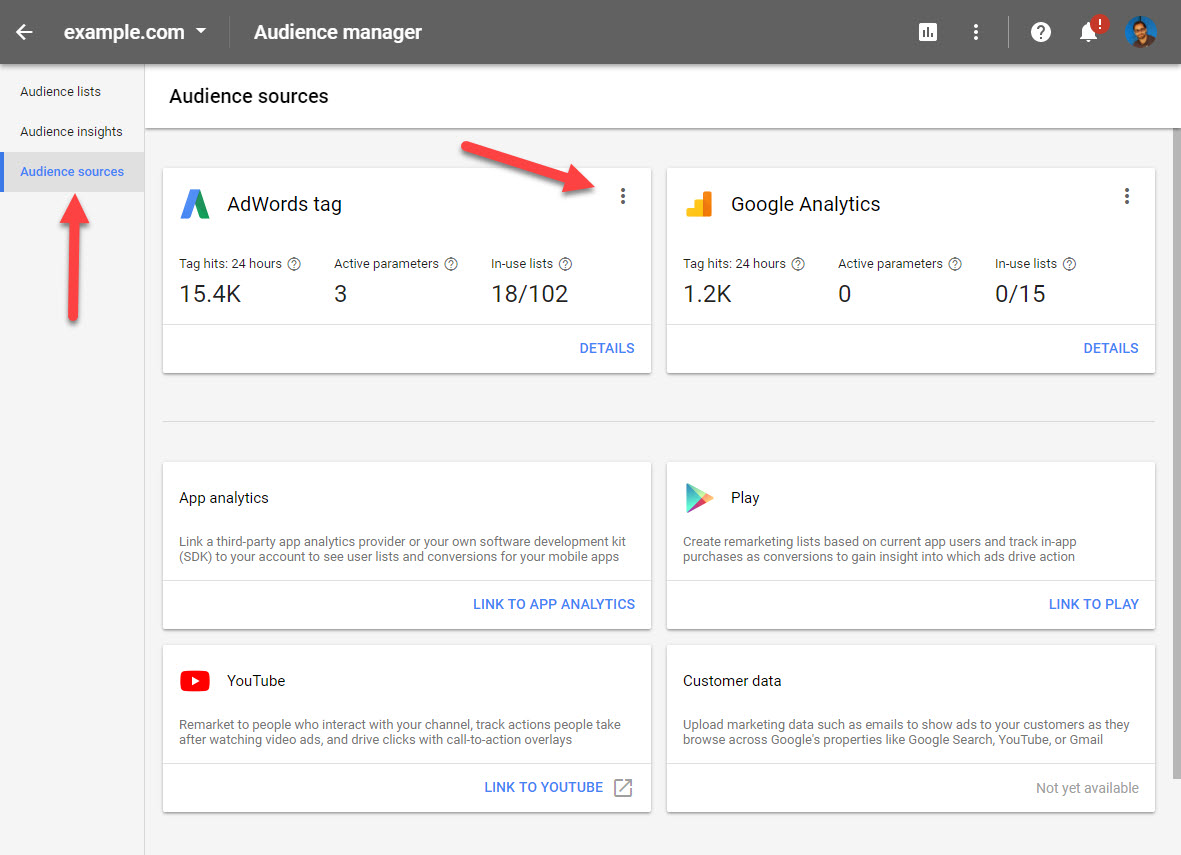
(continue here) From the left hand, menu click on Audience Source and click on the 3dot menu and choose edit source within the Adwords tag section
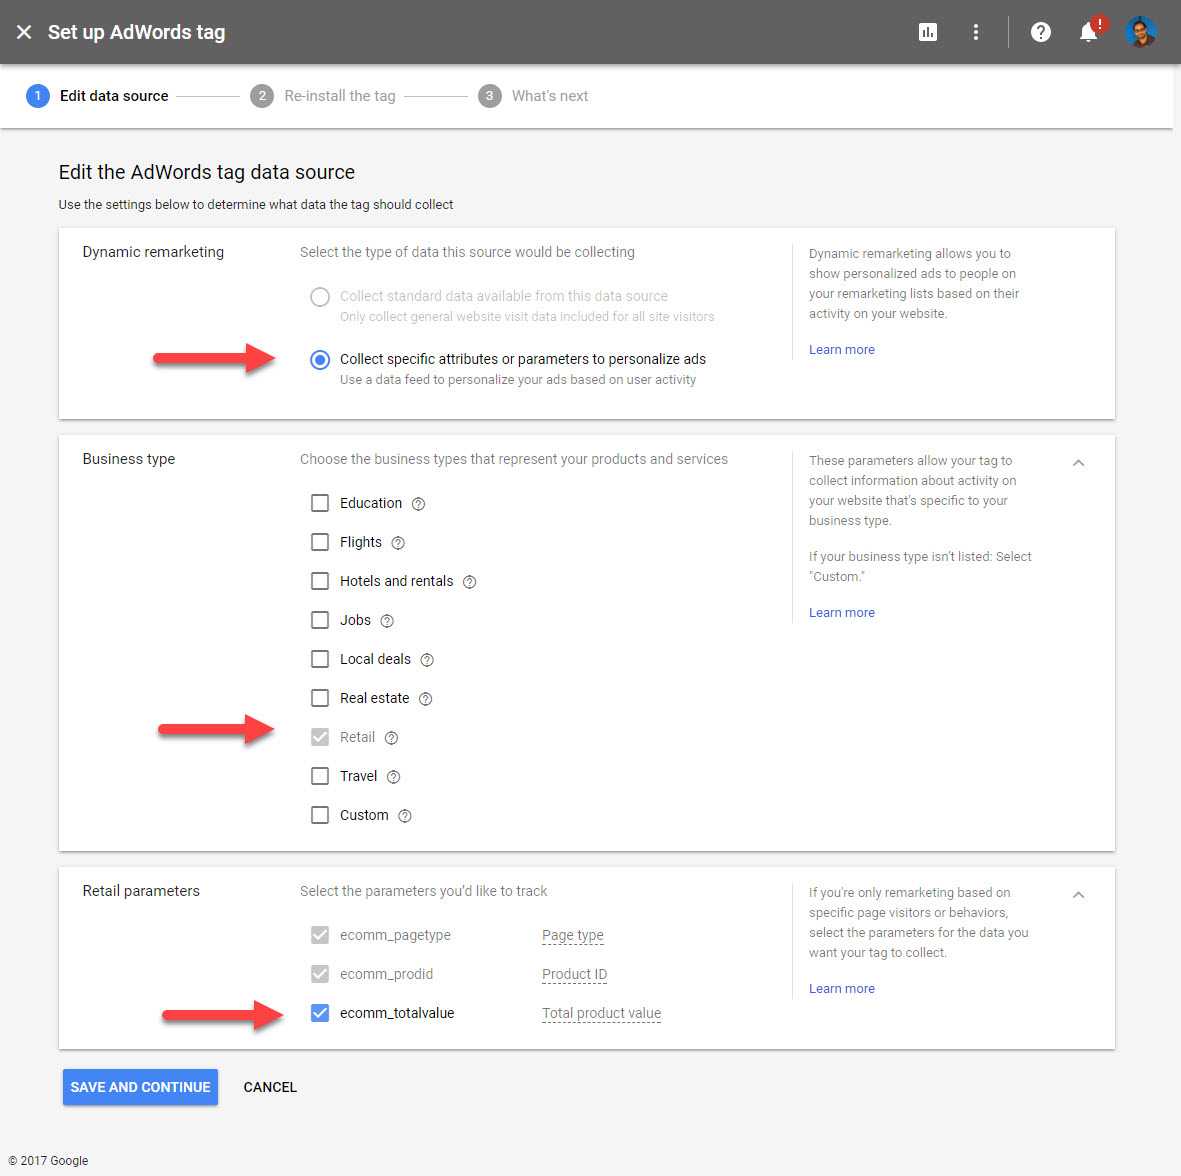
Select the following:
- Dynamic Remarketing
- Collect specific attributes or parameters to personalize ads
- Business Type
- Retail
- Retail Parameters (only shows if you have ever used the old code)
- ecomm_pagetype
- ecomm_prodid
- ecomm_totalvalue
Than download snippet, save this in a text editor file as a reference for the instructions below.
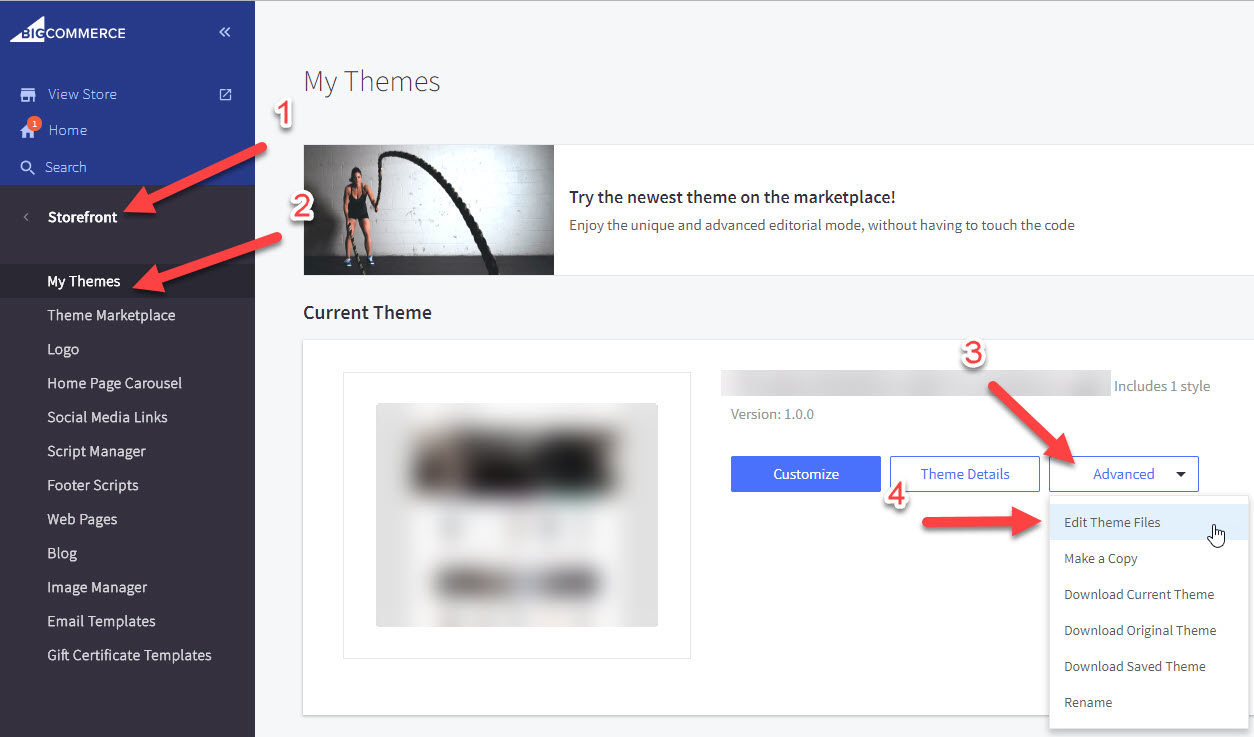
Edit Theme Files
Edit Theme by going to Storefront > My Themes > Inside the current theme, click on Advanced > Edit Theme Files
Product Page
Navigate templates/components/products/product-view.html
At the bottom of the file, paste the code below.
Important! :
- Change the XX-XXXXXXXXX three times with the value found in your downloaded script example gtag(‘config’, AW-123456798‘);
- <script async src=”https://www.googletagmanager.com/gtag/js?id=XX-XXXXXXXXX”></script>
- gtag(‘config’, ‘XX-XXXXXXXXX’);
- ‘send_to’: ‘XX-XXXXXXXXX’,
<!-- Global site tag (gtag.js) - Google Ads Tag Created By FeedArmy V2.01 for product page -->
<script async src="https://www.googletagmanager.com/gtag/js?id=XX-XXXXXXXXX"></script>
<script>
  window.dataLayer = window.dataLayer || [];
  function gtag(){dataLayer.push(arguments);}
  gtag('js', new Date());
  gtag('config', 'XX-XXXXXXXXX');
</script>
<script>
  gtag('event', 'view_item', {
    'send_to': 'XX-XXXXXXXXX',
    'value': '{{product.price.with_tax.value}}',
    'items': [{
      'id': '{{ product.id }}',
      'google_business_vertical': 'retail'
    }]
  });
</script>
Search Page
Navigate to : templates/components/search/heading.html
At the bottom of the file, paste the code below.
Important! :
Change the XX-XXXXXXXXX three times with the value found in your downloaded script example (’, AW-123456798‘);
- <script async src=”https://www.googletagmanager.com/gtag/js?id=XX-XXXXXXXXX”></script>
- gtag(‘config’, ‘XX-XXXXXXXXX’);
- ‘send_to’: ‘XX-XXXXXXXXX’,
<!-- Global site tag (gtag.js) - Google Ads Tag Created By FeedArmy V2.01 for search page -->
<script async src="https://www.googletagmanager.com/gtag/js?id=XX-XXXXXXXXX"></script>
<script>
  window.dataLayer = window.dataLayer || [];
  function gtag(){dataLayer.push(arguments);}
  gtag('js', new Date());
  gtag('config', 'XX-XXXXXXXXX');
</script>
<script>
  gtag('event', 'view_search_results', {
    'send_to': 'XX-XXXXXXXXX'
  });
</script>
Home Page
Navigate to : templates/pages/home.html
At the bottom of the file, paste the code below.
Important! :
Change the XX-XXXXXXXXX three times with the value found in your downloaded script example (’, AW-123456798‘);
- <script async src=”https://www.googletagmanager.com/gtag/js?id=XX-XXXXXXXXX”></script>
- gtag(‘config’, ‘XX-XXXXXXXXX’);
- ‘send_to’: ‘XX-XXXXXXXXX’,
<!-- Global site tag (gtag.js) - Google Ads Tag Created By FeedArmy V2.01 for home page -->
<script async src="https://www.googletagmanager.com/gtag/js?id=XX-XXXXXXXXX"></script>
<script>
  window.dataLayer = window.dataLayer || [];
  function gtag(){dataLayer.push(arguments);}
  gtag('js', new Date());
  gtag('config', 'XX-XXXXXXXXX');
</script>
<script>
  gtag('event', 'home', {
    'send_to': 'XX-XXXXXXXXX'
  });
</script>
Cart Page
Navigate to : templates/components/cart/content.html
At the bottom of the file, paste the code below.
Change the XX-XXXXXXXXX three times with the value found in your downloaded script example (’, AW-123456798‘);
- <script async src=”https://www.googletagmanager.com/gtag/js?id=XX-XXXXXXXXX”></script>
- gtag(‘config’, ‘XX-XXXXXXXXX’);
- ‘send_to’: ‘XX-XXXXXXXXX’,
<!-- Global site tag (gtag.js) - Google Ads Tag Created By FeedArmy V2.01 for cart page -->
<script async src="https://www.googletagmanager.com/gtag/js?id=XX-XXXXXXXXX"></script>
<script>
  window.dataLayer = window.dataLayer || [];
  function gtag(){dataLayer.push(arguments);}
  gtag('js', new Date());
  gtag('config', 'XX-XXXXXXXXX');
</script>
<script>
  gtag('event', 'add_to_cart', {
    'send_to': 'XX-XXXXXXXXX',
    'value': '{{cart.grand_total.value}}',
	{{#each cart.items}}
    'items': [{
      'id': '{{product.id}}',
      'google_business_vertical': 'retail'
    }],
	{{/each}}
  });
</script>
Checkout
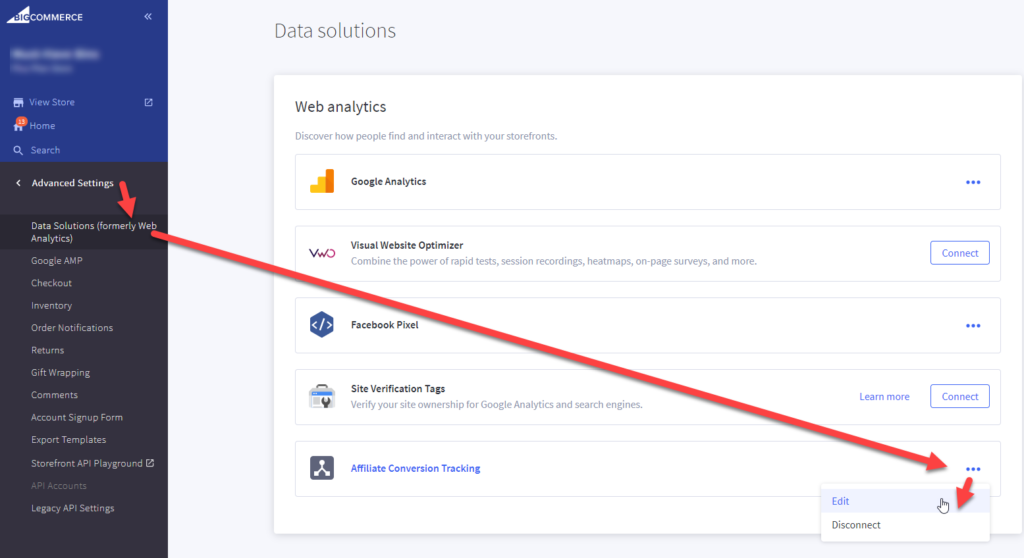
Go to Advanced Settings > Data Solutions > Affiliate Conversion Tracking

Paste the below code in the box and save

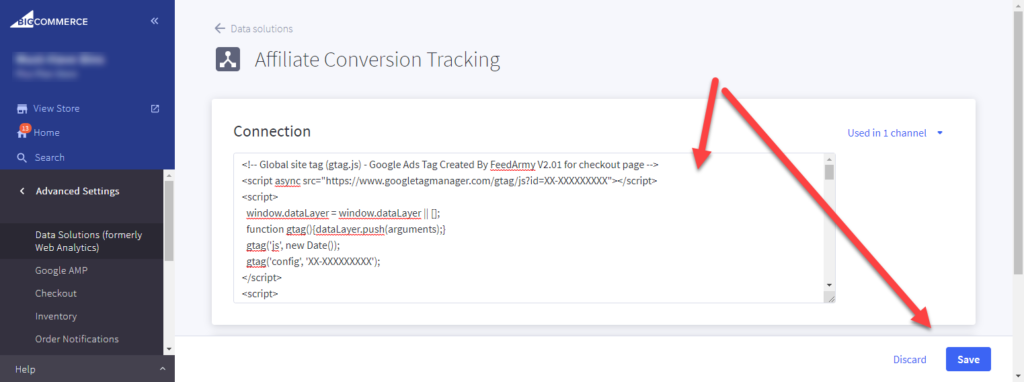
Change the XX-XXXXXXXXX three times with the value found in your downloaded script example (‘config’, AW-123456798‘);
- <script async src=”https://www.googletagmanager.com/gtag/js?id=XX-XXXXXXXXX”></script>
- gtag(‘config’, ‘XX-XXXXXXXXX’);
- ‘send_to’: ‘XX-XXXXXXXXX’,
<!-- Global site tag (gtag.js) - Google Ads Tag Created By FeedArmy V2.01 for checkout page -->
<script async src="https://www.googletagmanager.com/gtag/js?id=XX-XXXXXXXXX"></script>
<script>
  window.dataLayer = window.dataLayer || [];
  function gtag(){dataLayer.push(arguments);}
  gtag('js', new Date());
  gtag('config', 'XX-XXXXXXXXX');
</script>
<script>
  gtag('event', 'purchase', {
    'send_to': 'XX-XXXXXXXXX',
    'value': '%%ORDER_AMOUNT%%',
  });
</script>
Validate Product ID
To check if the product ID is correct, go to the product landing page and right-click > view source code. Then search for FeedArmy, and you will see the product id. You can compare this product against what is submitted in Google Merchant Center by going to Products > List.
Google Ads Shows Product ID Warnings
It will take Google Ads up to 30+ days to update all pages because Google’s bots do not check every page every day, but over 30+ days. Wait and compare week by week, you will see changes in the number of id’s found.