


![Install Google Analytics 4 in Shopify [April 2022 Update]](https://i.ytimg.com/vi/vua_H06B6xw/hqdefault.jpg)
Google Analytics 4 (GA4) is currently not a replacement for Google Analytics Universal (GA3). GA4 is data driven and creates a different set of reports. While GA3 collects data based on sessions and pageviews, GA4 collects data based on events and parameters.
GA4 allows you to automatically track events based on enhanced measurements.
However as of writing, for eCommerce tracking, GA3 provides more data compared to GA4.
Shopify currently does not have a solution for adding Google Analytics 4 by default. We will install it manually for all pages, including the checkout. This installation is possible for all Shopify subscription plans.
Requirements
- Access to Google Analytics (admin)
- Access to Shopify > Online Store > Preferences
- Access to Shopify > Online Store > Themes > checkout.liquid
- Access to Shopify > Settings > Checkout
- Access to Google Tag Manager (admin)
Step 1 Get Your GA4 Code
Log in to your Google Analytics account and select your default property.
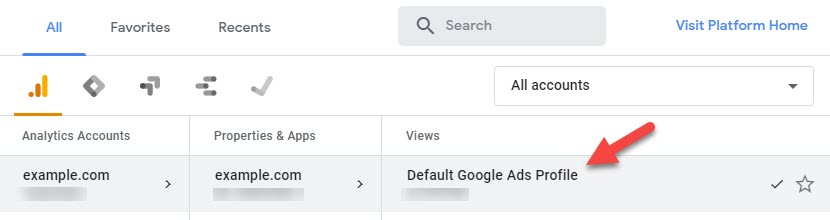
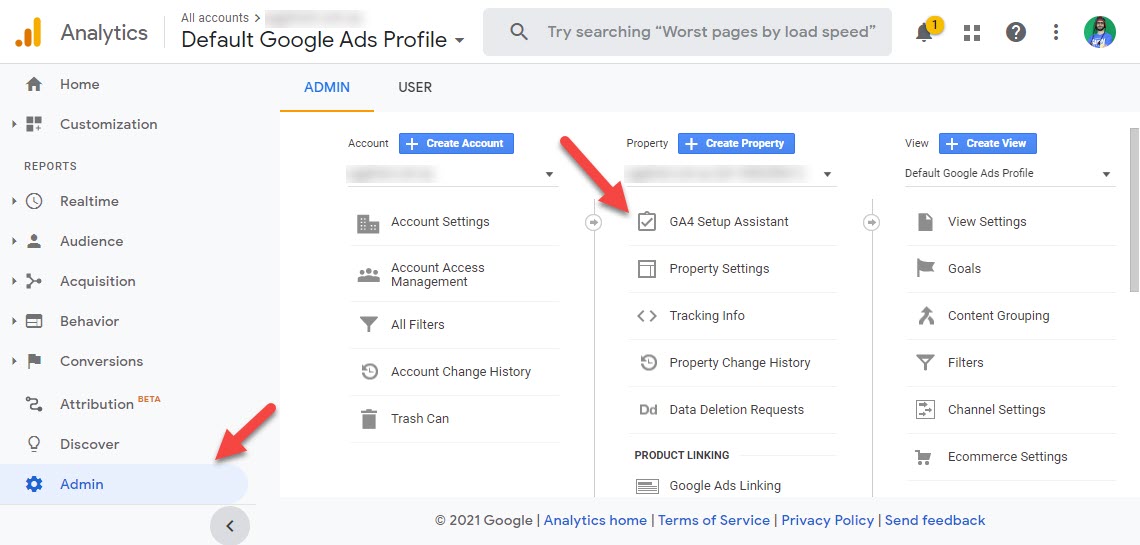
Click on Admin in the bottom left corner and select GA4 Setup Assistant under property.
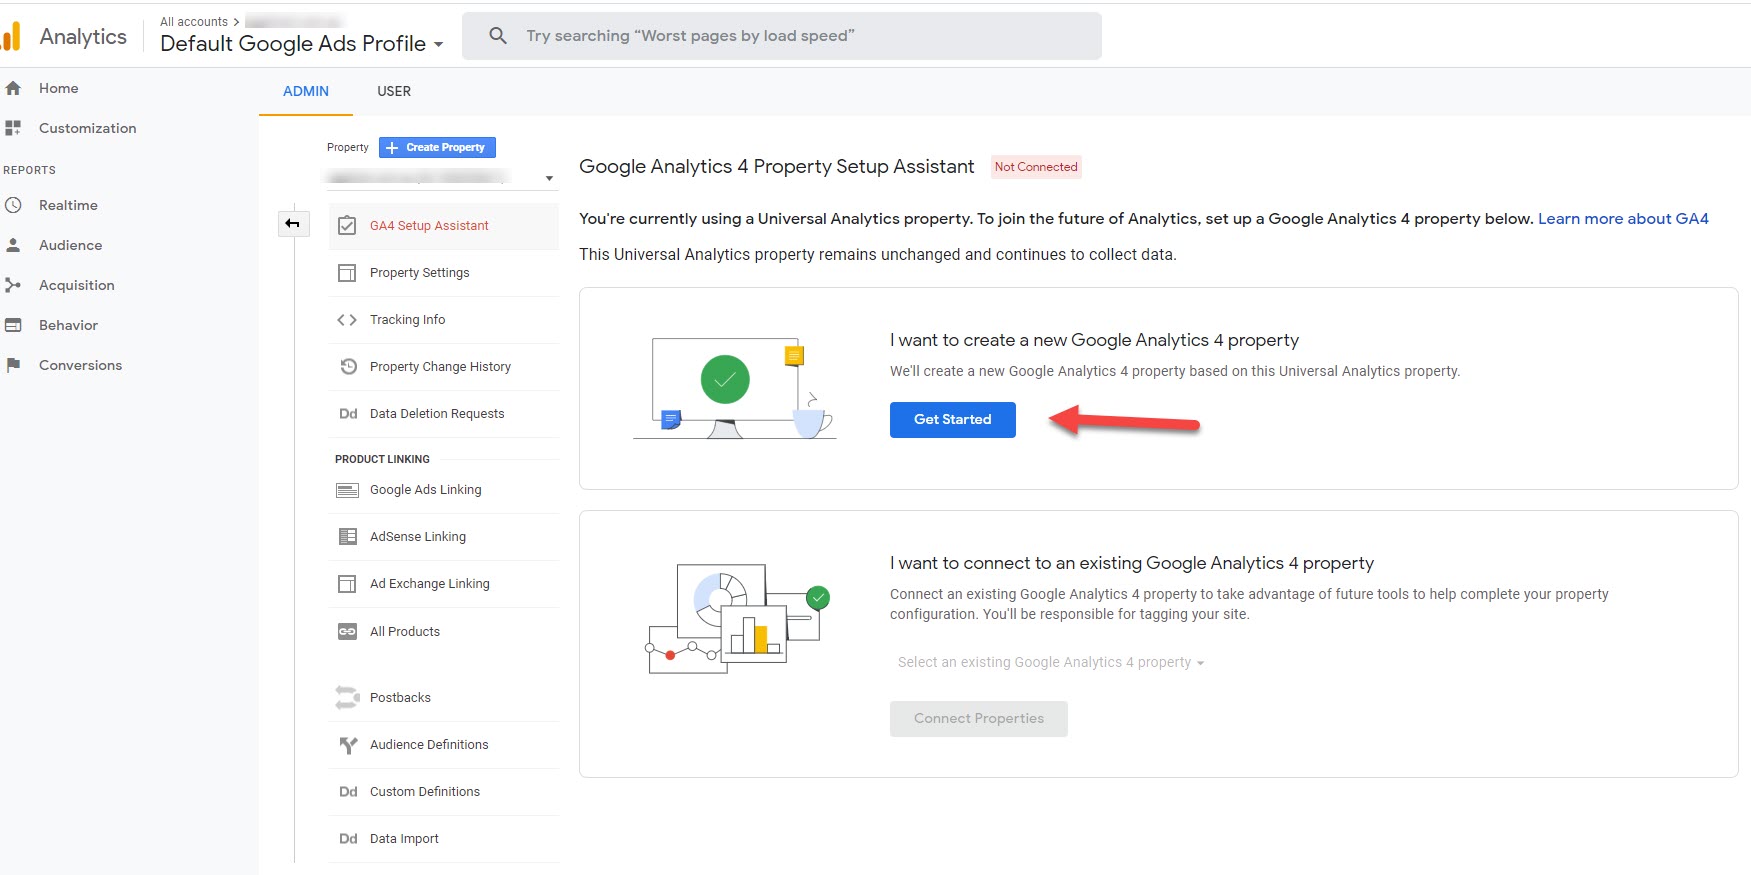
Click on Get Started
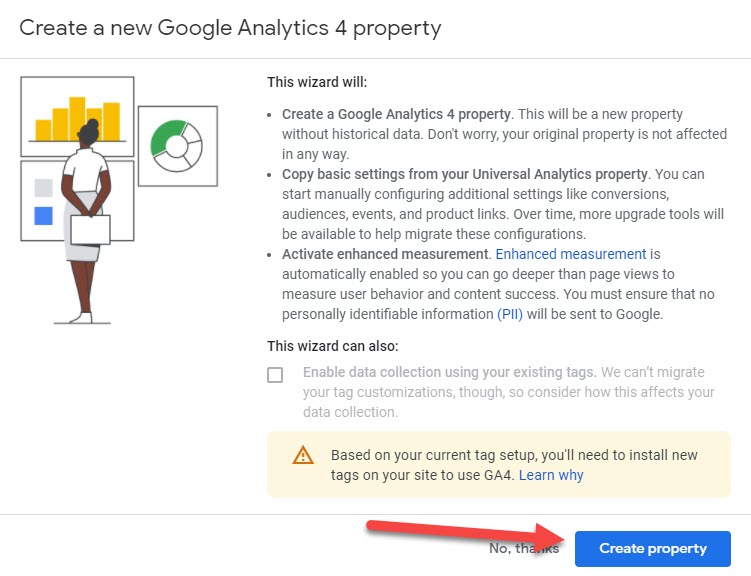
Create your new GA4 Property by clicking create.
Click on See Your GA4 Property and a new tab will open.

Click on Tag Installation.
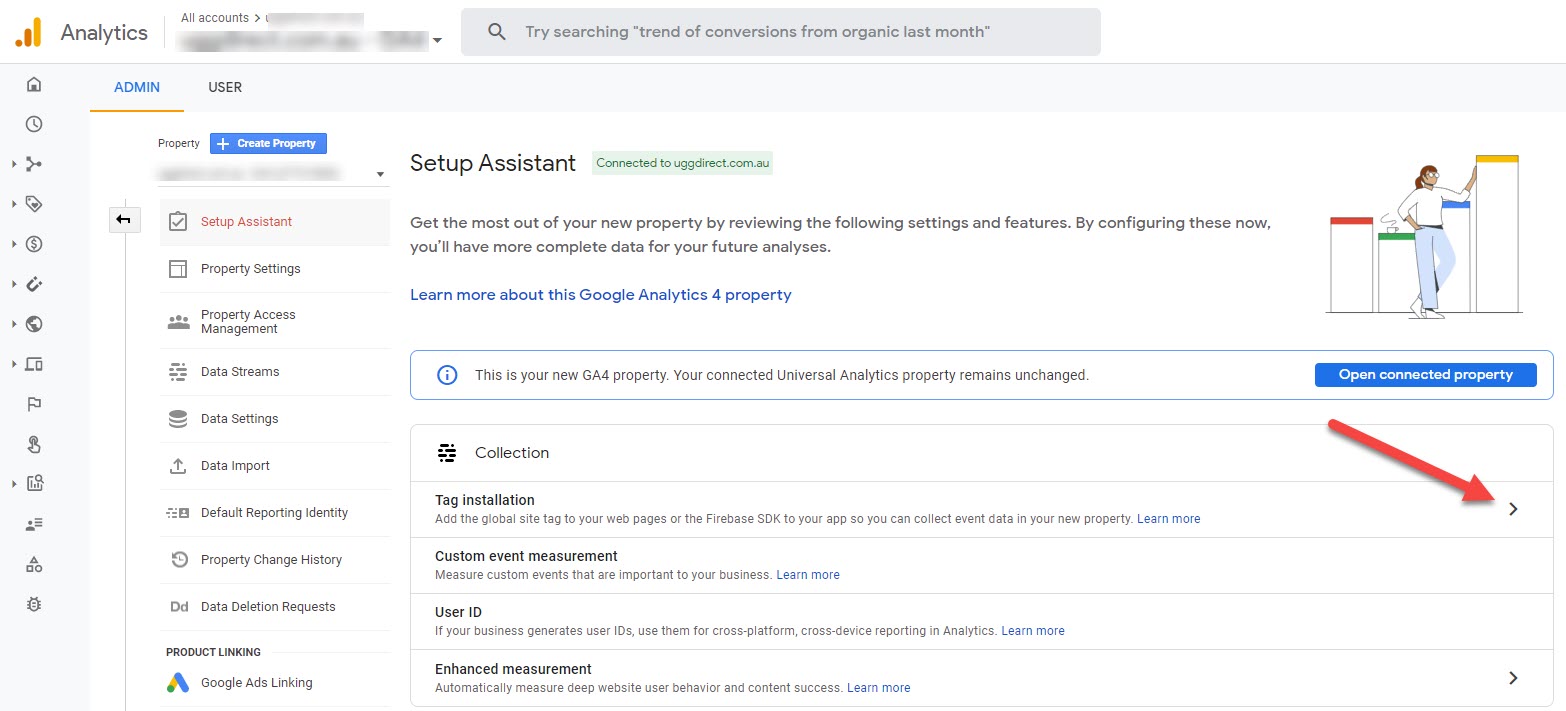
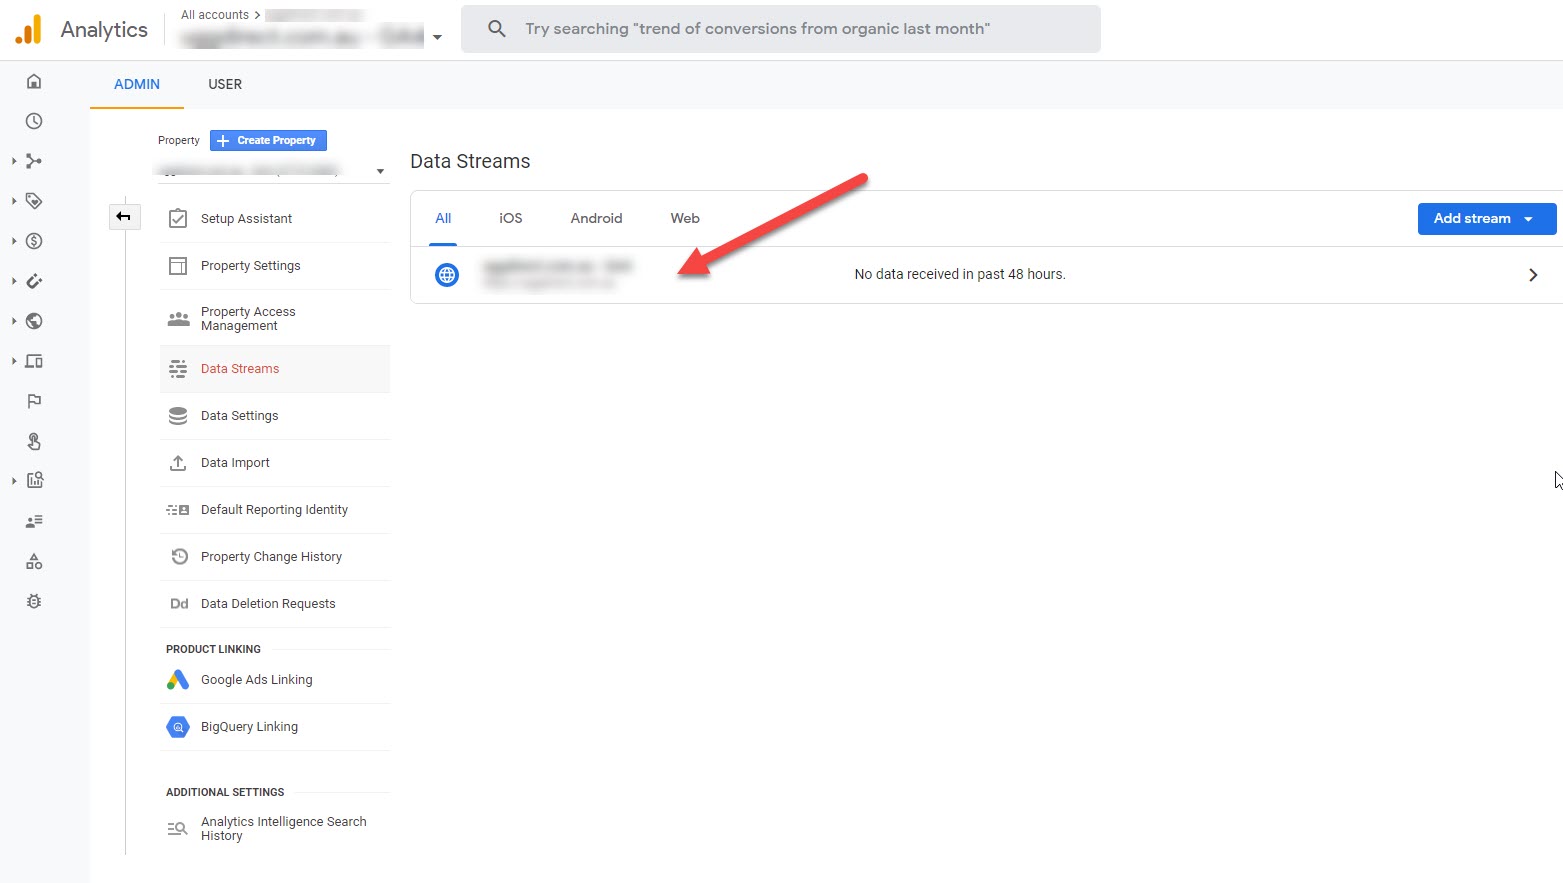
Click on your property underneath all data streams.
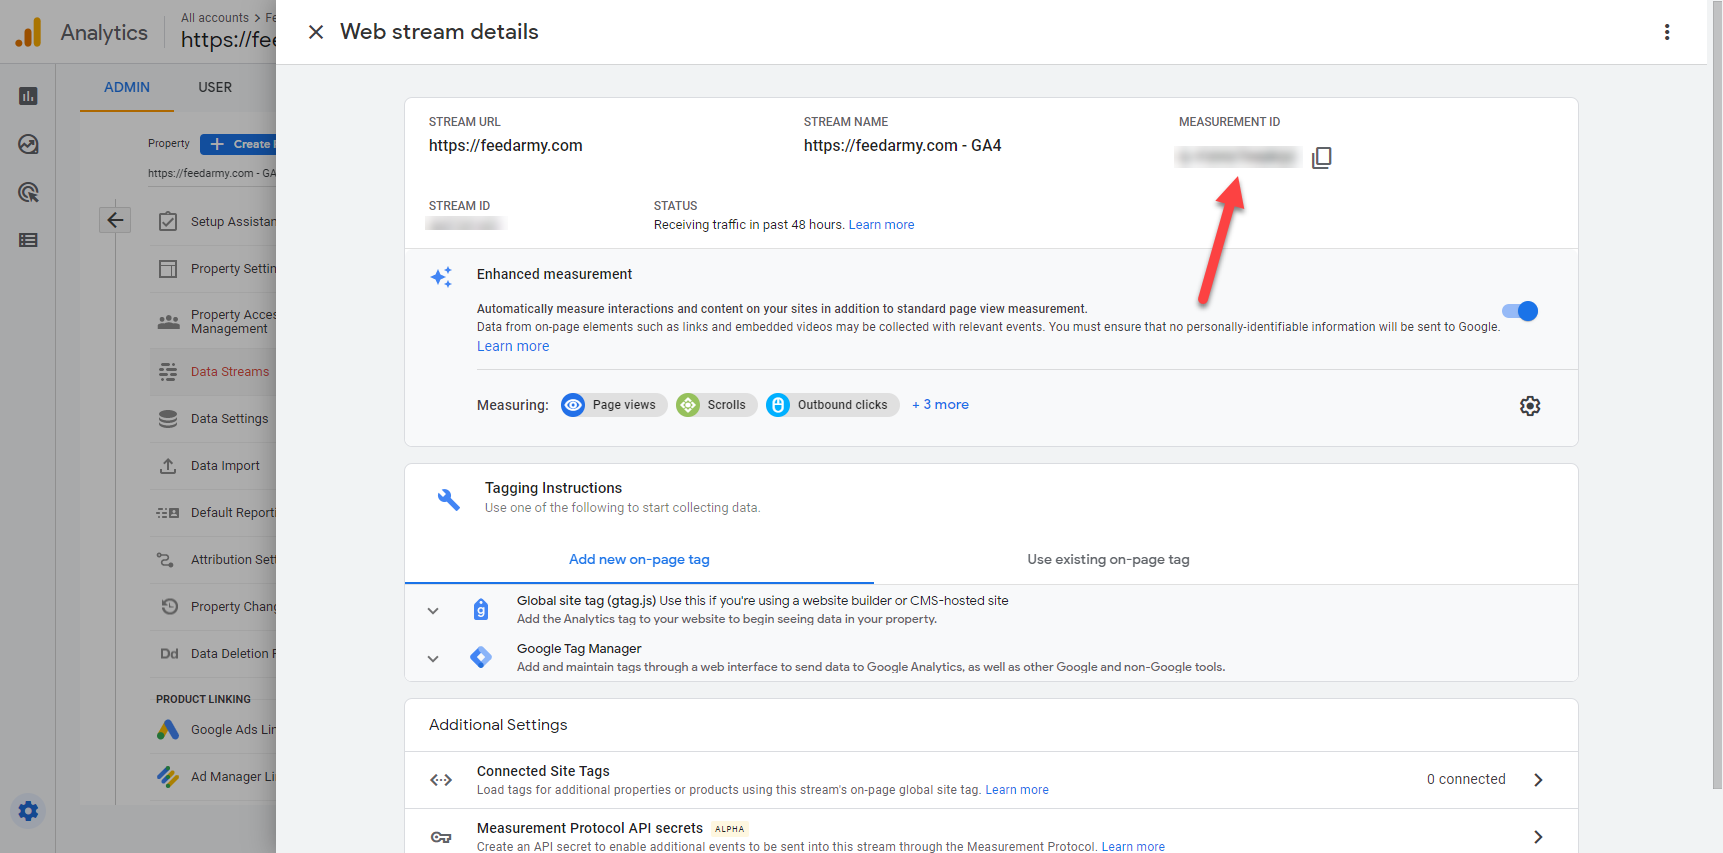
Copy your Google Analytics 4 Measurement ID in the top right corner paste in a file for later use or keep this tab open.
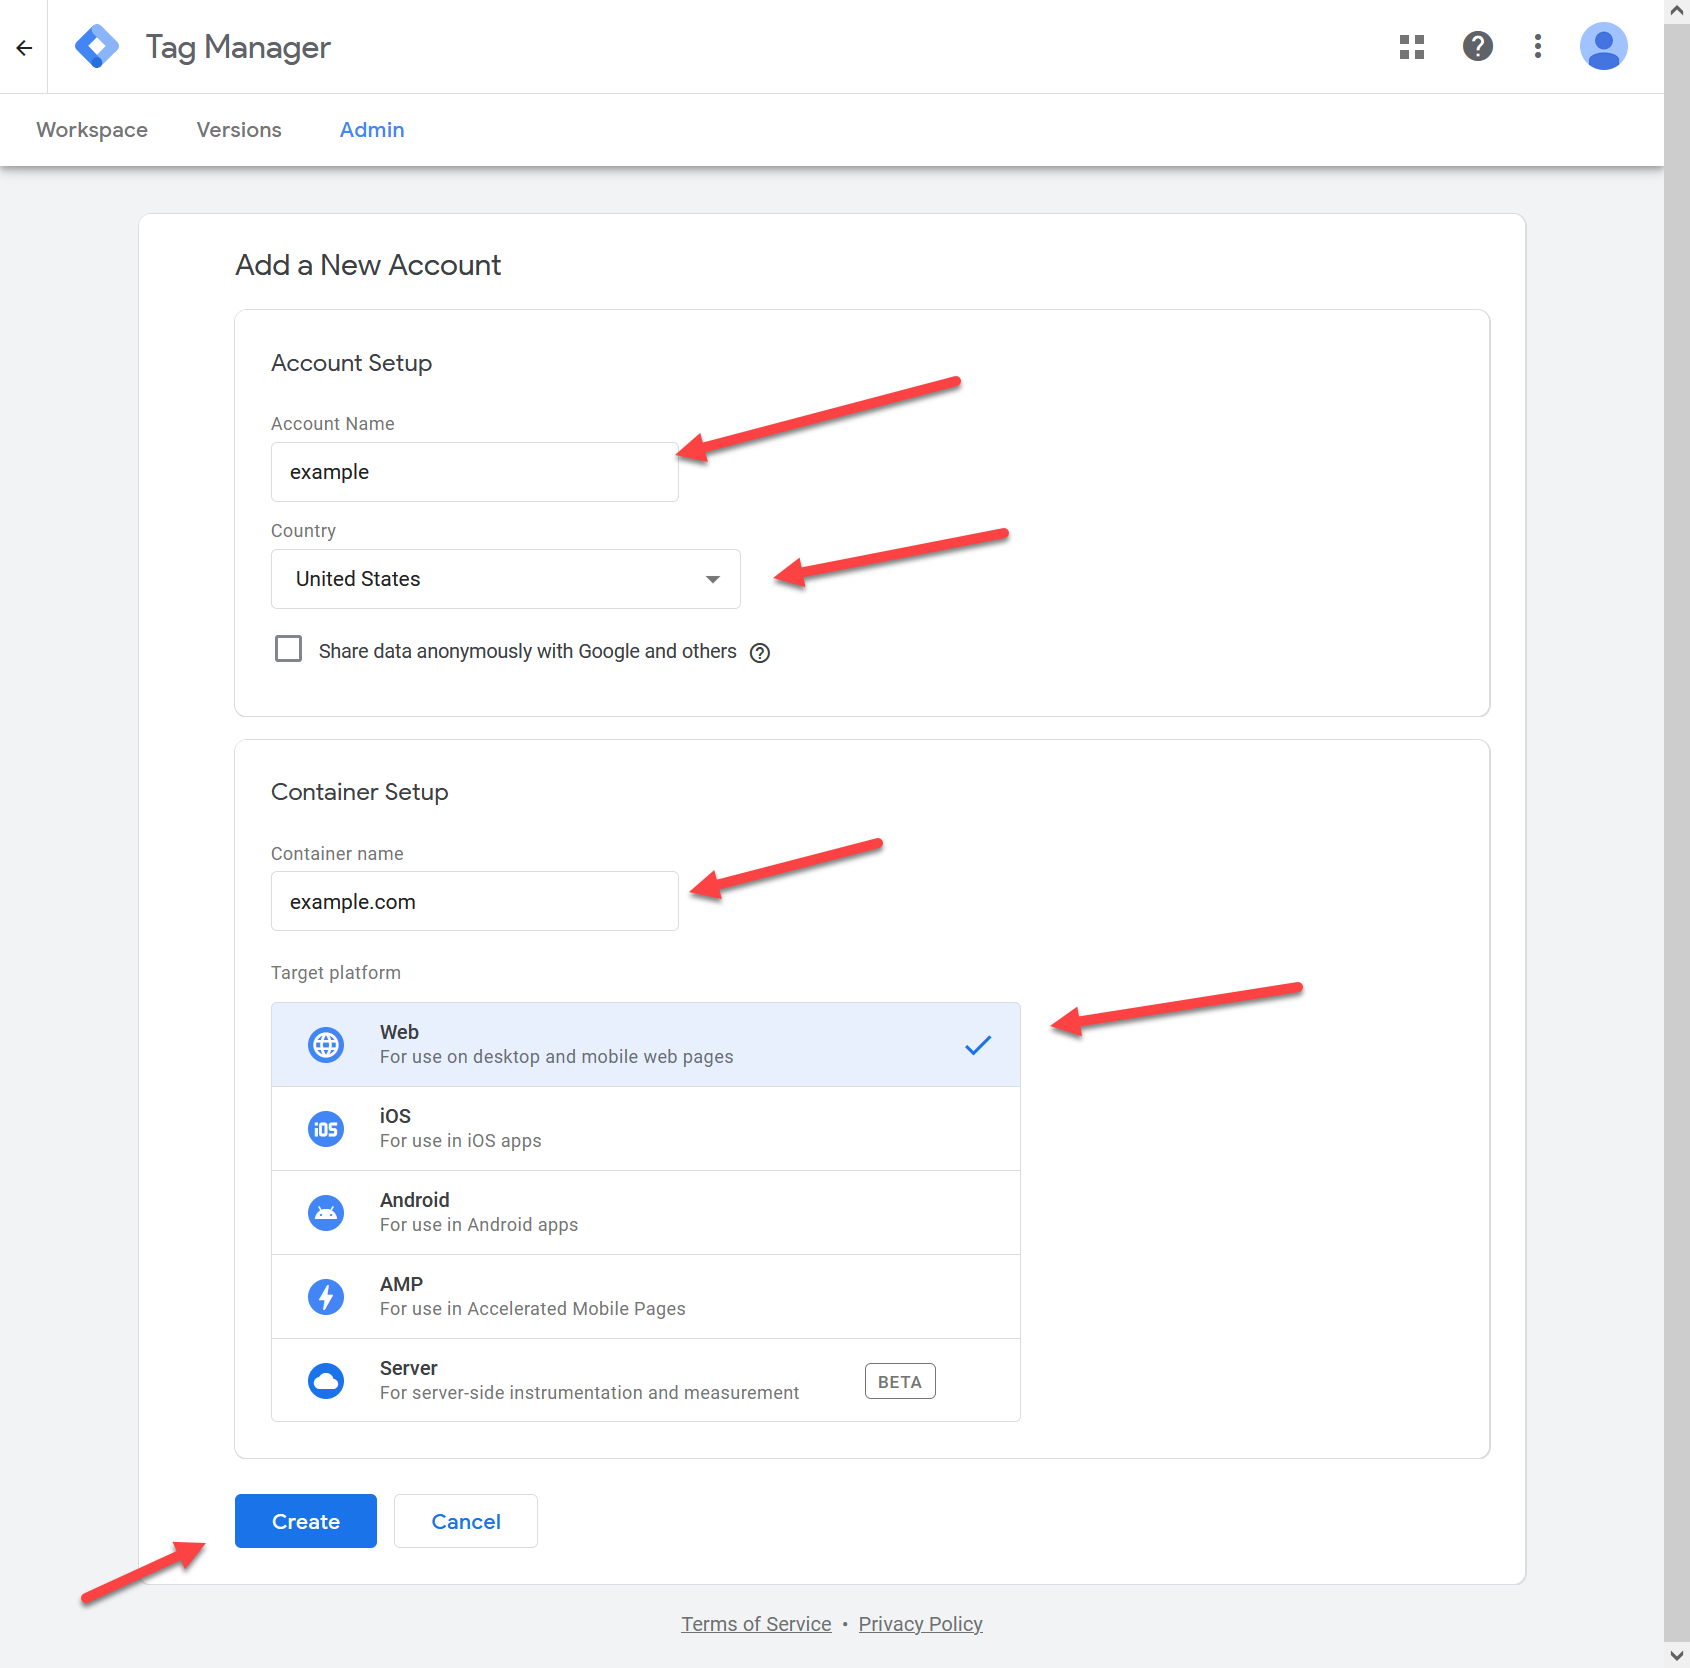
Step 2 Install & Setup Google Tag Manager
Log in to Google Tag Manager. If you don’t have an account, create one using the steps below. If you already have an account skip these steps.
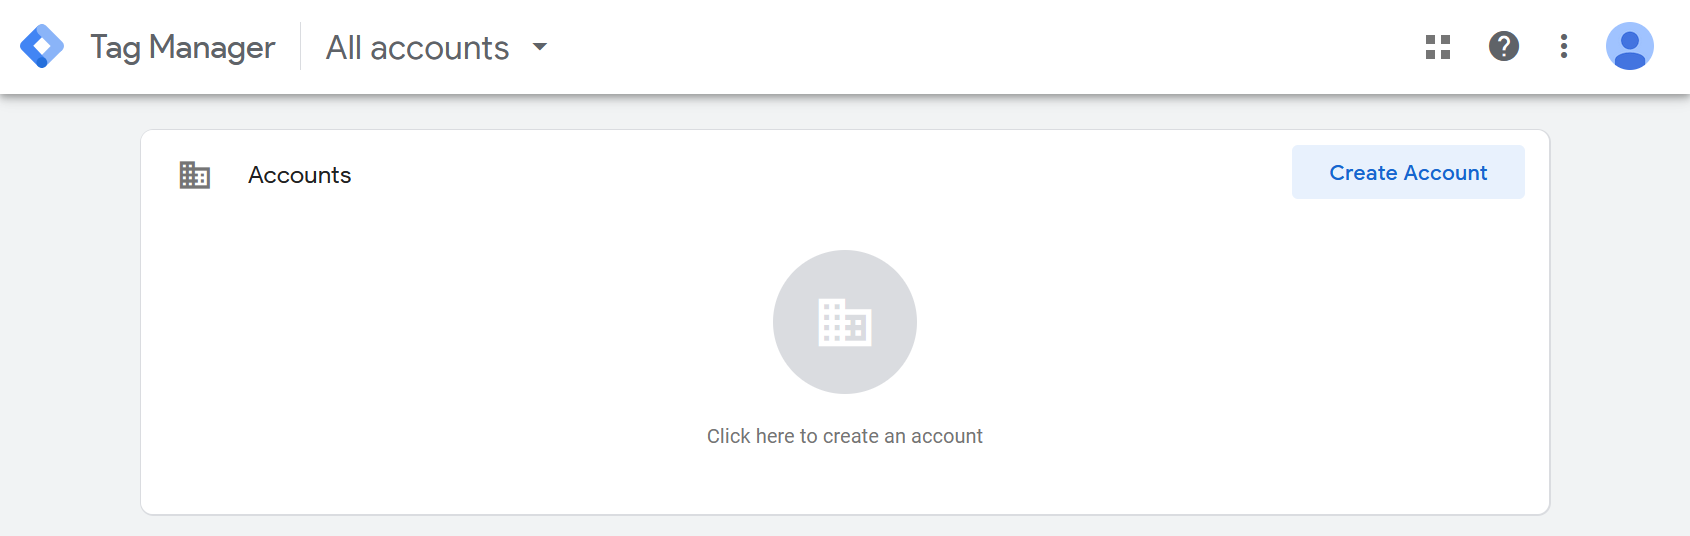
Create your account and enter all the details with the target platform Web selected. When you click on create, accept the terms and conditions.
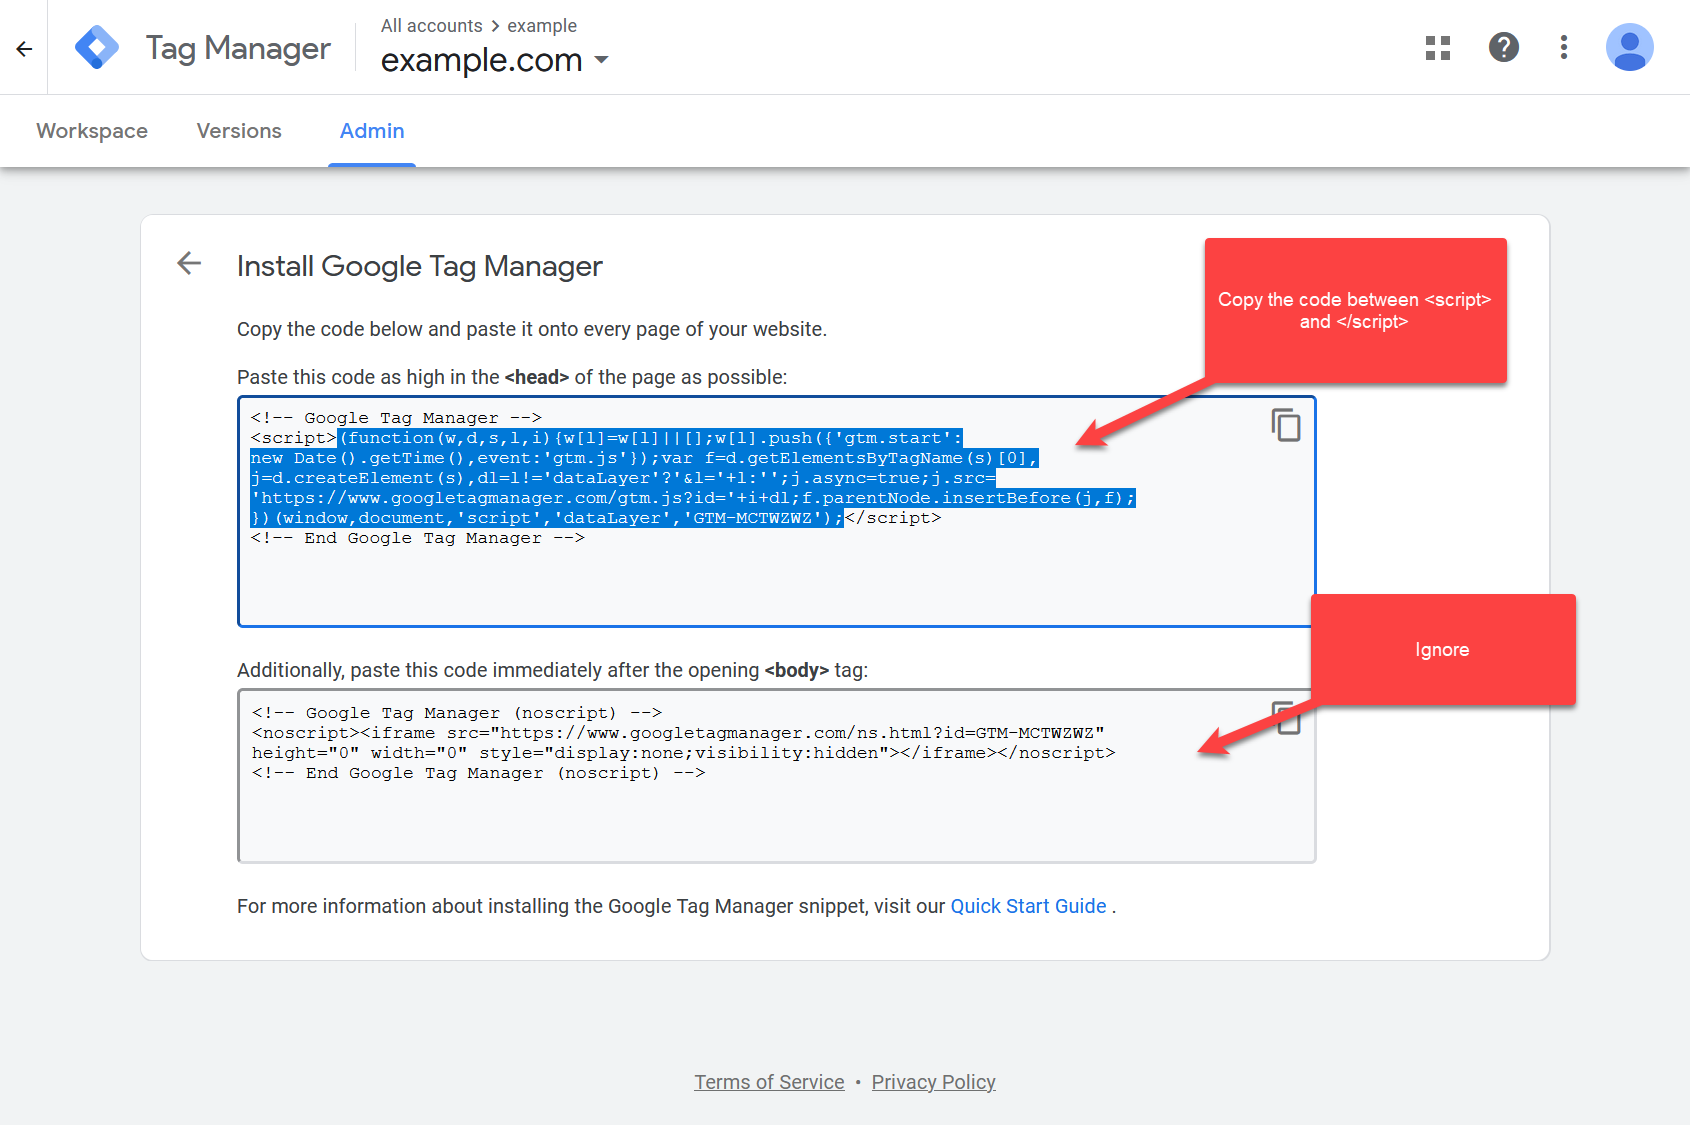
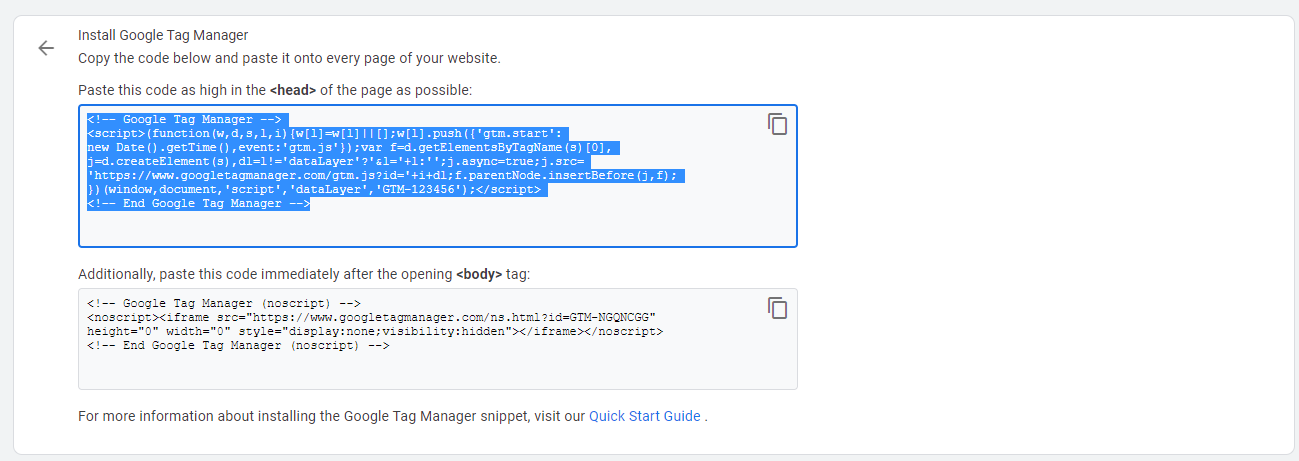
Now a popup will appear with the tag installation codes. If you have already closed this or have not yet installed it, you can find the code by going to Admin > click on Install Google Tag Manager. (Keep this tab open for use later)

Before installing Google Tag Manager, we need to install Google Analytics Universal code if you have not done this yet.
Step 3 Install Google Analytics and Google Tag Manager
You can skip this step if you have already done so.
Go to Google Analytics (Select your normal Universal Analytics account) > Admin > Tracking Info > Tracking Code
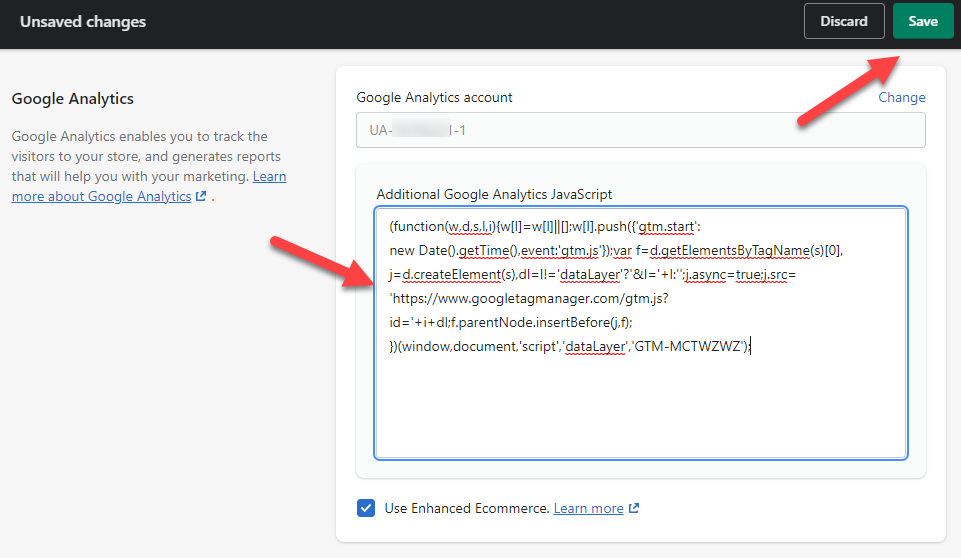
Copy your GTAG, go to Shopify > Online Store > Preferences, paste your code in the Google Analytics section, and click on save.
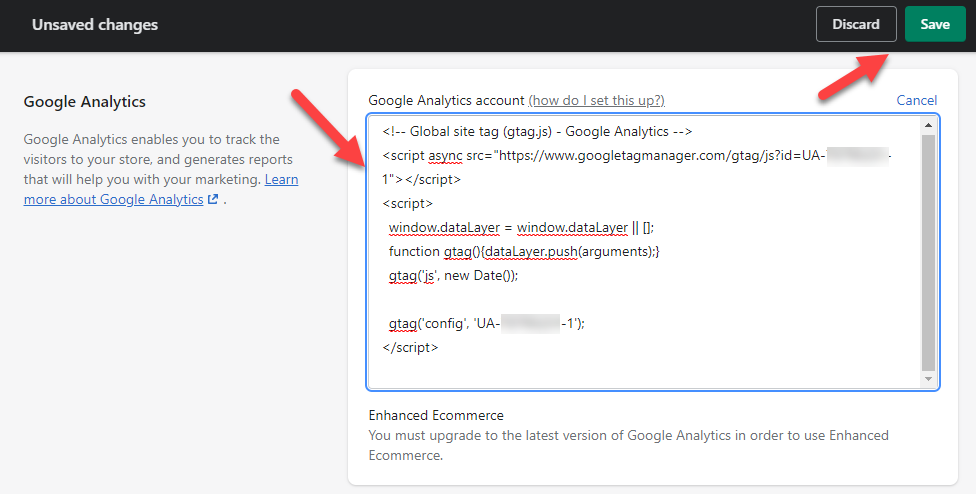
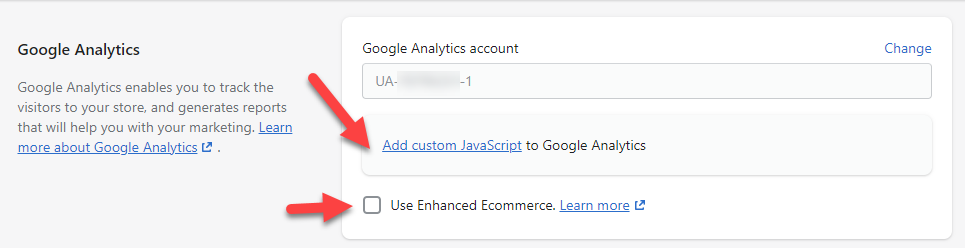
Once saved, reload the page and click on add custom javascript, and if not yet enabled, also enable enhanced eCommerce.
Now open your Google Tag Manager tab again and copy the code in the head section between opening script and closing script tag, as highlighted in the image below.
You can ignore the body tag. The iframe tag is only for users that have javascript disabled. This is because the percentage of users with javascript disabled is so low, and when disabled, in most cases, users can not navigate your website as it uses javascript to function.
Paste your code in Shopify and Save.
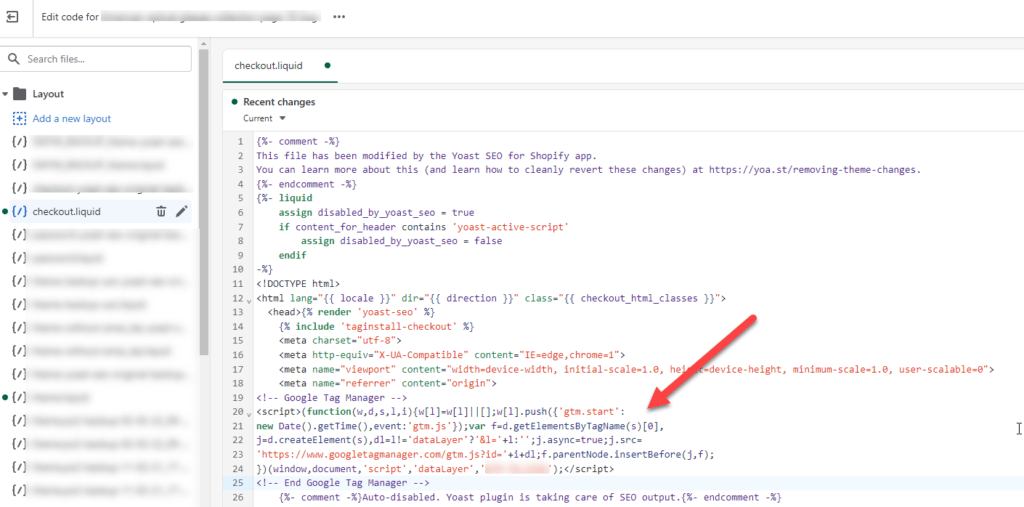
Go back to Google Tag Manager and copy the head code.
In Shopify, navigate to Online Store > Themes > checkout.liquid and paste your code in the head section.

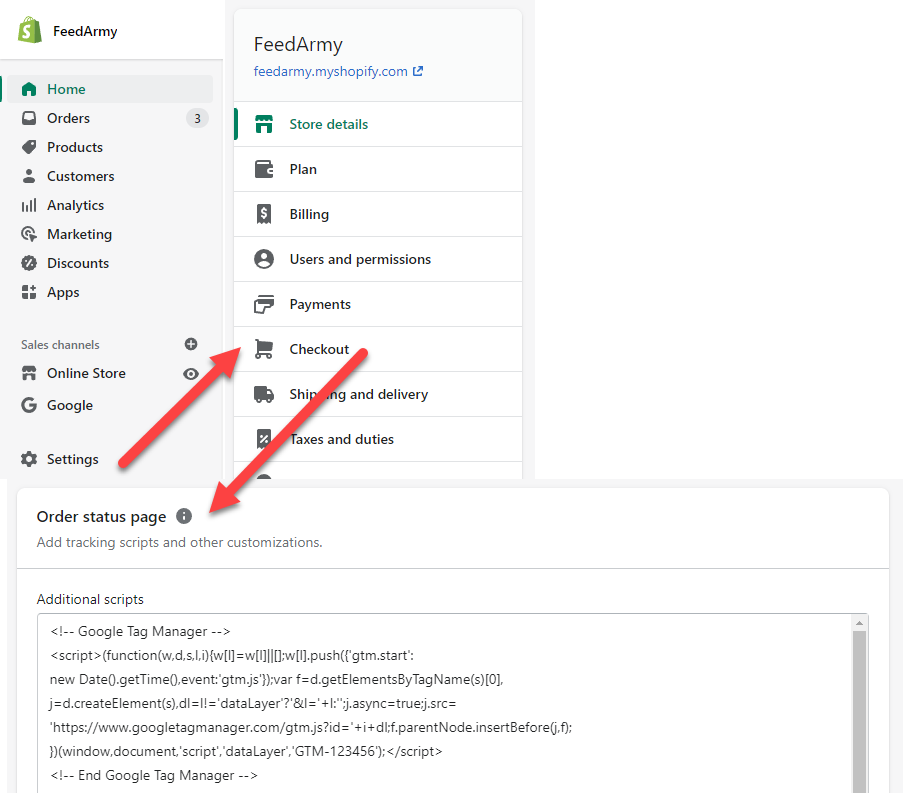
In Shopify, navigate to Settings > Checkout > Order Status Page and paste your code.
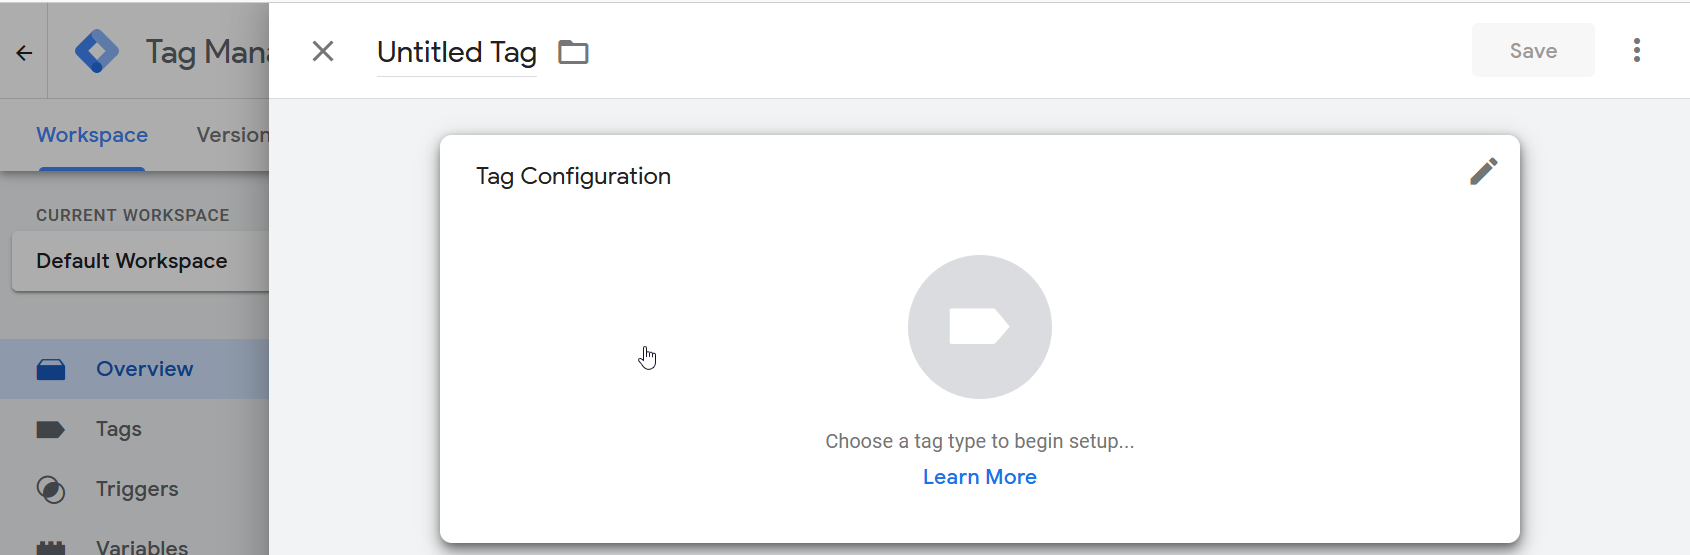
Step 4 Install Google Analytics 4 In Shopify Using Tag Manager
In Google Tag Manager, click on Workspace > Overview > Add New Tag
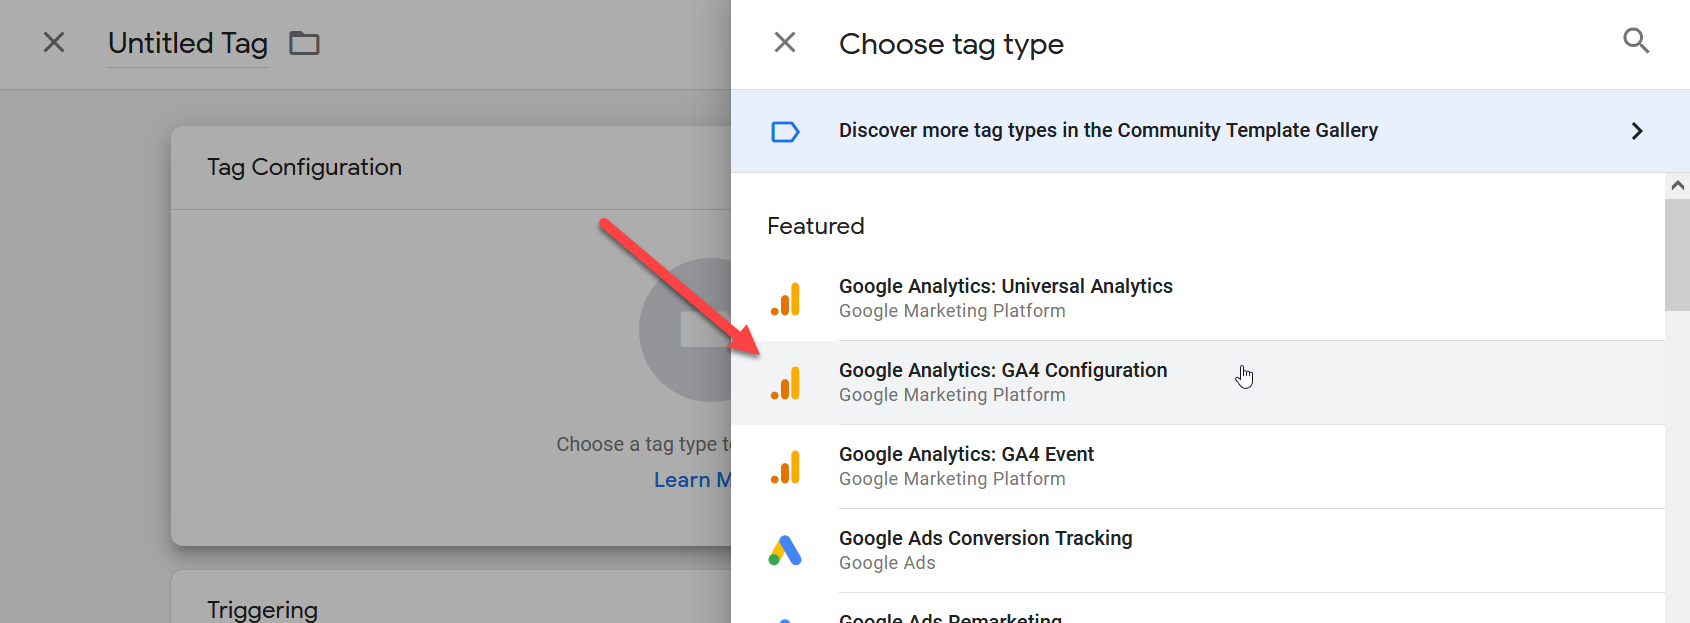
Click on Tag Configuration
Select Google Analytics GA4 Configuration
Now copy your Google Analytics 4 Measurement ID and paste it in Google Tag Manager.

Now click on Trigger and choose all pages.

Click on Save and keep the renamed tag.
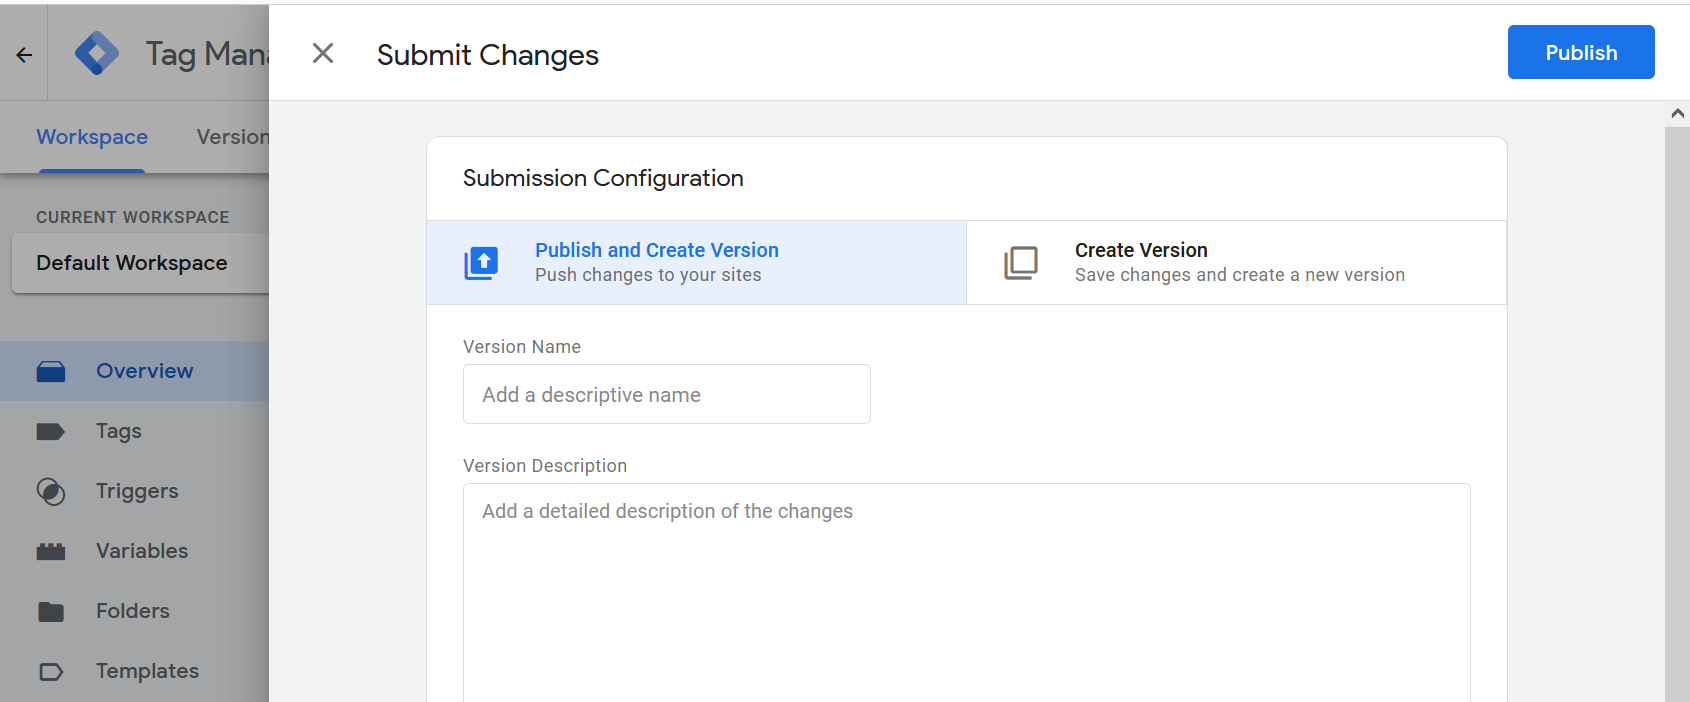
Before the code is live, we need to submit it by clicking on submit in the top right corner.
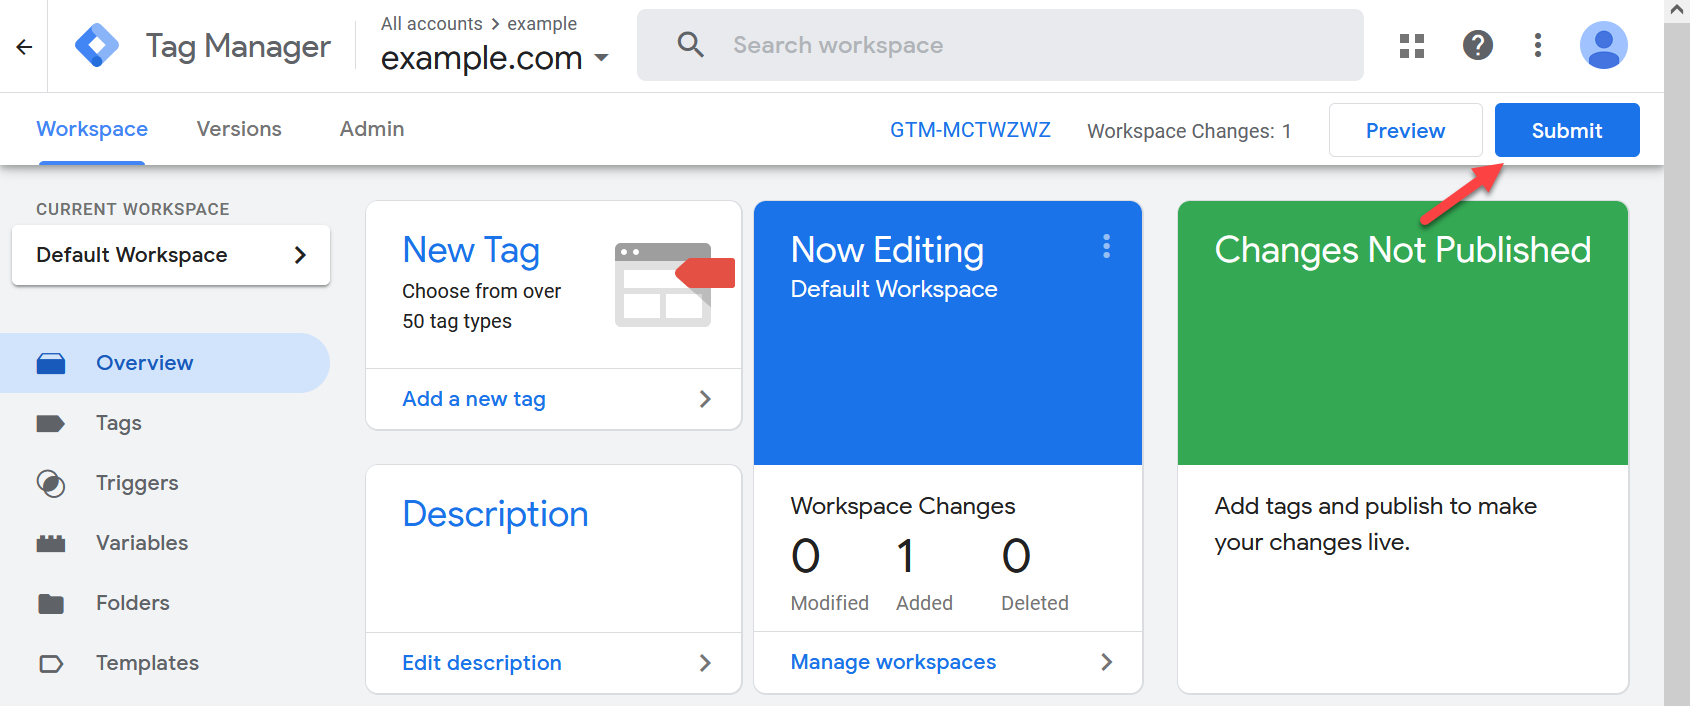
Give it a name and description and click on Publish.
Within 24 hours your data will start flowing in Google Analytics.
Ecommerce Event Tracking
If you want to track events when users enter your websites, such as tracking product landing page info and purchase data, then you can use Google & Youtube app, and only enable the GA4 setup. (If you don’t want to use the data feed features)
Change Log
- V3 – 26 April 2022 – Added steps to install GTM tag in the checkout thank you page.
- V2 – 15 August 2021 – Improved The Setup For All Pages, Suggested By Adam Gorecki